

KCI Wound VAC User Manual: How To Use & Troubleshoot
If you’ve been sent home with a negative pressure wound therapy device, or you’re a caregiver managing one for a loved one, you’ve probably already discovered that the KCI wound VAC user manual can feel overwhelming. These devices are powerful tools for healing complex wounds, but the thick technical documentation that ships with them isn’t always easy to navigate, especially when an alarm starts beeping at 2 a.m. and you need a quick, clear answer.
KCI (now under 3M) manufactures several wound VAC models, including the ActiV.A.C., V.A.C. Ulta, and V.A.C. ATS. Each system has its own interface, alert codes, and maintenance requirements. Understanding how to operate the device correctly, from setting the right pressure to troubleshooting a canister seal leak, directly affects wound healing outcomes. Mistakes or delays in resolving device issues can compromise the negative pressure seal and slow recovery.
At Philadelphia Wound Care, our physician-led mobile practice manages complex wounds across homes, skilled nursing facilities, and hospice settings throughout the Philadelphia area. We work with patients using VAC therapy regularly, and we know firsthand how many questions come up between scheduled visits. This guide breaks down the essential operating steps and most common troubleshooting scenarios for KCI wound VAC systems, so you can manage your device with confidence and know when it’s time to call your wound care provider.
What to know before using a KCI Wound VAC
Before you touch any settings or connect a canister, you need to understand how these systems work at a basic level. KCI wound VAC devices apply continuous or intermittent negative pressure to a wound to draw out excess fluid, reduce swelling, and promote tissue growth. They are medical devices, and the KCI wound VAC user manual that ships with your specific unit is your first reference for model-specific instructions, pressure ranges, and alarm codes. Reading at least the quick-start section before your first session is not optional.
Safety and supply checks
You should confirm a few things before starting or restarting therapy. First, check that the dressing components you have on hand match the prescribed configuration for your wound type. KCI systems typically use a foam or gauze wound filler, a drape to seal the wound bed, and a SensaT.R.A.C. pad that connects the tubing to the canister.
Running the device with an incompatible or improperly sized dressing is one of the most common causes of seal failures and therapy interruptions.
Before each use, also confirm that the canister is not full and that the tubing is free of kinks. A blocked or overfull canister will trigger an alert and halt negative pressure delivery entirely.
Understanding your therapy prescription
Your clinician sets a target pressure level, typically measured in mmHg (millimeters of mercury), and selects either continuous or intermittent therapy mode. Do not change these settings without direct guidance from your wound care provider. Both the pressure setting and therapy mode are chosen based on wound type, tissue condition, and healing stage, and changing them without clinical input can delay healing or damage fragile tissue.
You should also keep your printed discharge instructions nearby during each session. These typically list your prescribed therapy hours per day, dressing change schedule, and specific warning signs that require a call to your provider.
Step 1. Identify your model and key parts
Before you troubleshoot anything, confirm which KCI wound VAC model you have. The model name is printed on a label on the front or bottom of the therapy unit. The three most common models are the ActiV.A.C., V.A.C. Ulta, and V.A.C. ATS, and each one has a different interface and alert system.
The KCI wound VAC user manual for your specific model is the only accurate reference for alert codes and pressure ranges, so confirm your model before looking anything up.
Find your model name
Check the device label for the full model name and serial number. Your discharge paperwork or DME supplier documentation should also list the model, and 3M’s support line can direct you to the correct quick-reference guide if yours is missing.
Core components to recognize
Knowing the main parts of your device prevents confusion during setup and troubleshooting. Every KCI wound VAC system uses these components:
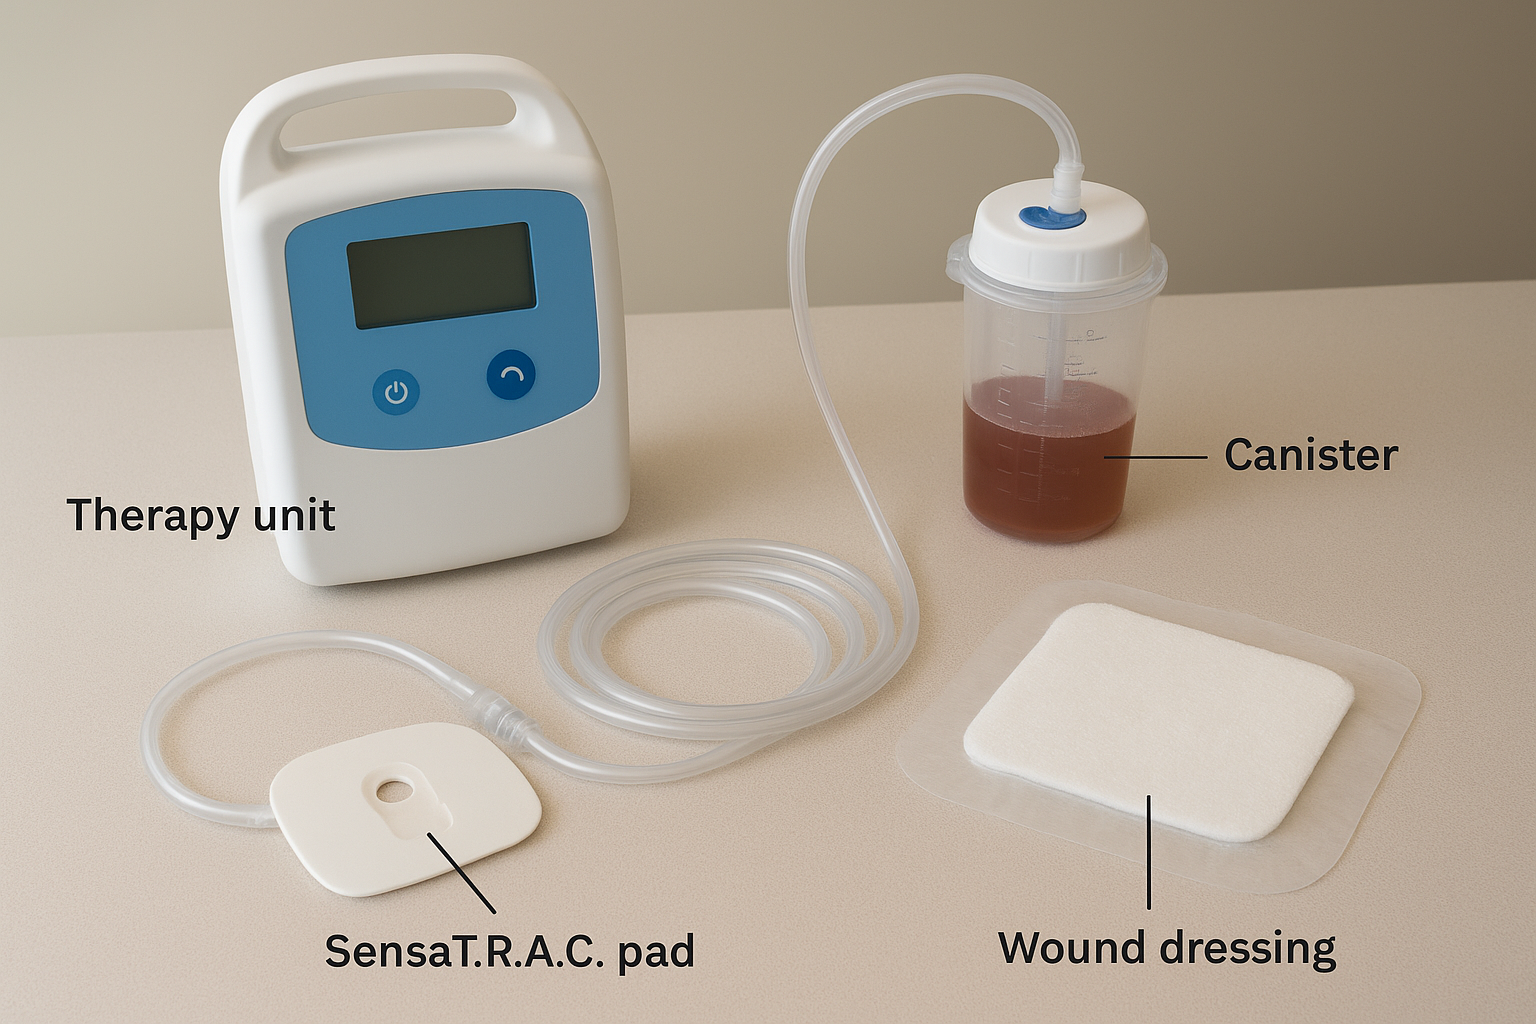
- Therapy unit: the main device that generates negative pressure
- Canister: collects wound fluid; replace when full
- SensaT.R.A.C. pad: connects the dressing tubing to the canister
- Tubing set: carries negative pressure from the unit to the wound
- Wound dressing: foam or gauze filler plus a sealing drape
Step 2. Start therapy and check the seal
After confirming your supplies and dressing match the prescription, you’re ready to start the device. Press the power button to turn on the therapy unit, then connect the tubing by clicking the SensaT.R.A.C. pad firmly into the canister port until you hear a click.
Confirm the seal before walking away
A secure seal is the single most critical factor in effective negative pressure therapy. Once the device starts, watch the pressure reading on the display screen. If it climbs to your prescribed target and holds steady within 30 to 60 seconds, the seal is intact. If the display shows a leak alert or the pressure never stabilizes, check the drape edges for any lifted corners or gaps over bony prominences like heels or ankles.
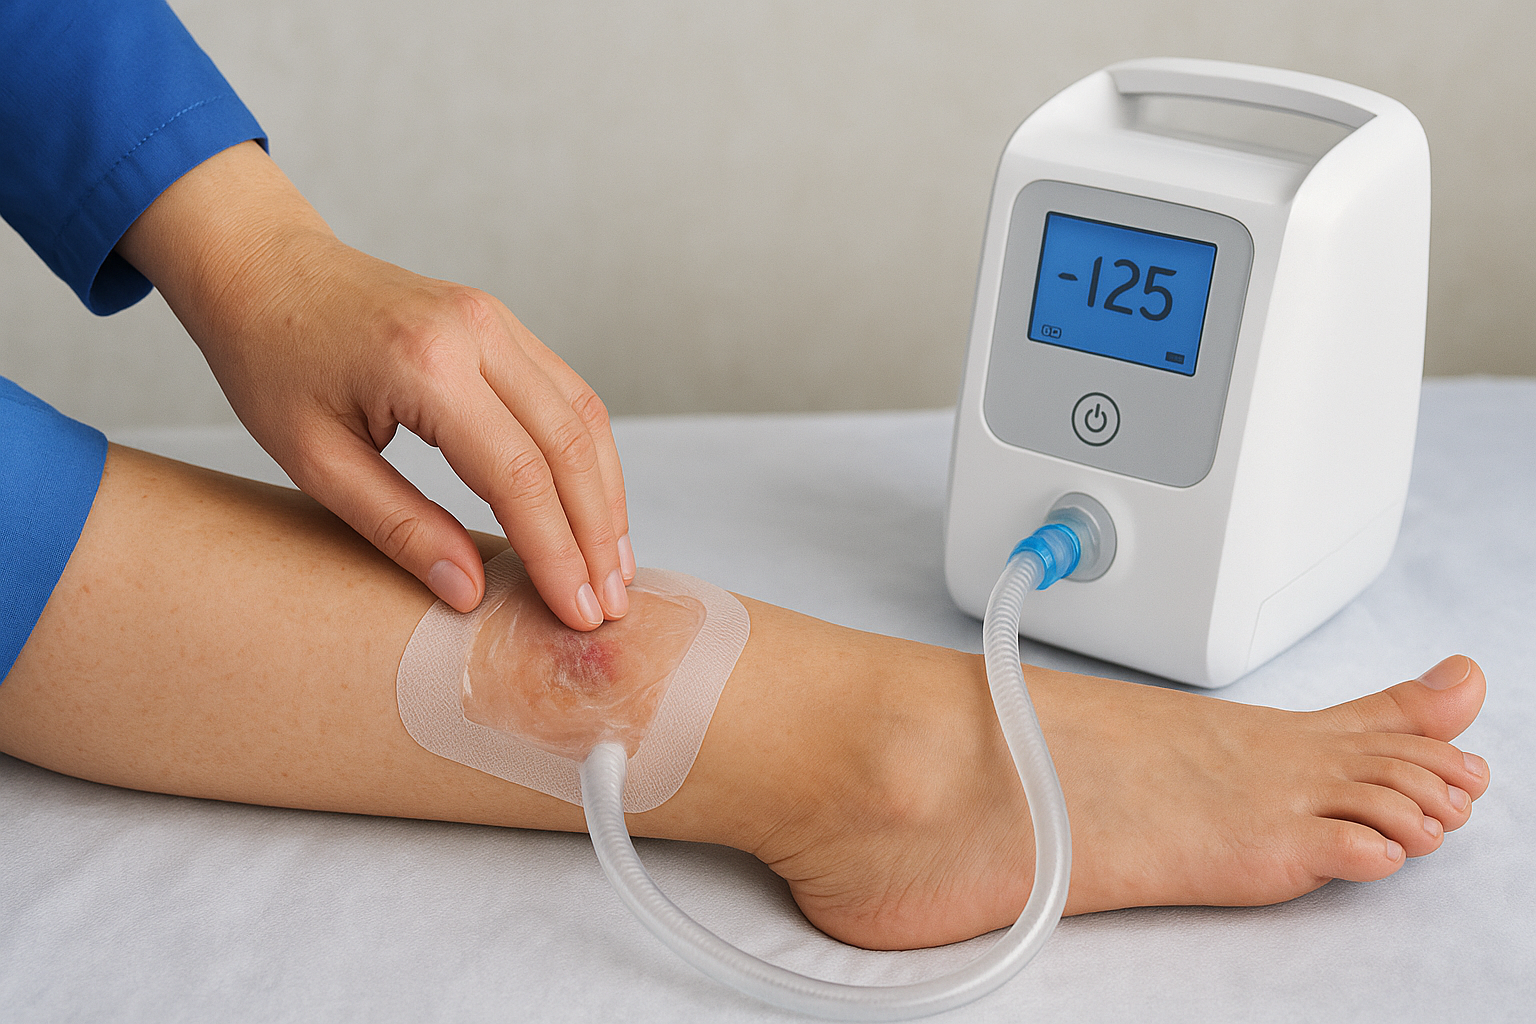
A failed seal is the most common reason therapy gets interrupted, and most seal failures happen at the drape edges rather than at the tubing connection.
Your kci wound vac user manual includes a diagram showing proper drape placement for different wound locations. Use it as a reference when re-sealing. Press the drape down firmly from the center outward to push out air pockets before restarting the device.
Step 3. Adjust settings and manage daily use
Once therapy is running and the seal holds, your job shifts to routine monitoring and documentation. Daily use is straightforward once you understand what to watch for and when to act.
Adjust pressure or therapy mode
Only change the pressure setting or therapy mode if your wound care provider has given you explicit written instructions to do so. To adjust pressure on most KCI units, press the settings button, use the arrow keys to reach your new target in mmHg, and confirm the change. Your kci wound vac user manual lists the exact button sequence for your specific model, so follow that before adjusting anything.
Never increase pressure above the prescribed level, even if you think the wound looks better, because too much negative pressure can damage new tissue.
Track fluid output and daily dressing checks
Log the canister fluid level each morning and after any significant activity. If the canister fills faster than expected, contact your provider. Check these items every day:
- Drape edges for lifting or bubbling
- Tubing connections for any visible cracks or moisture
- Skin around the wound for redness or irritation
- Device display for any active alert codes
Step 4. Fix alerts and common problems
Most KCI wound VAC alarms are easy to resolve at home once you know what each alert means. The device display shows a code or icon, and the kci wound vac user manual for your model lists every alert with a step-by-step resolution. Start there before calling your supplier.
Common alert codes and what they mean
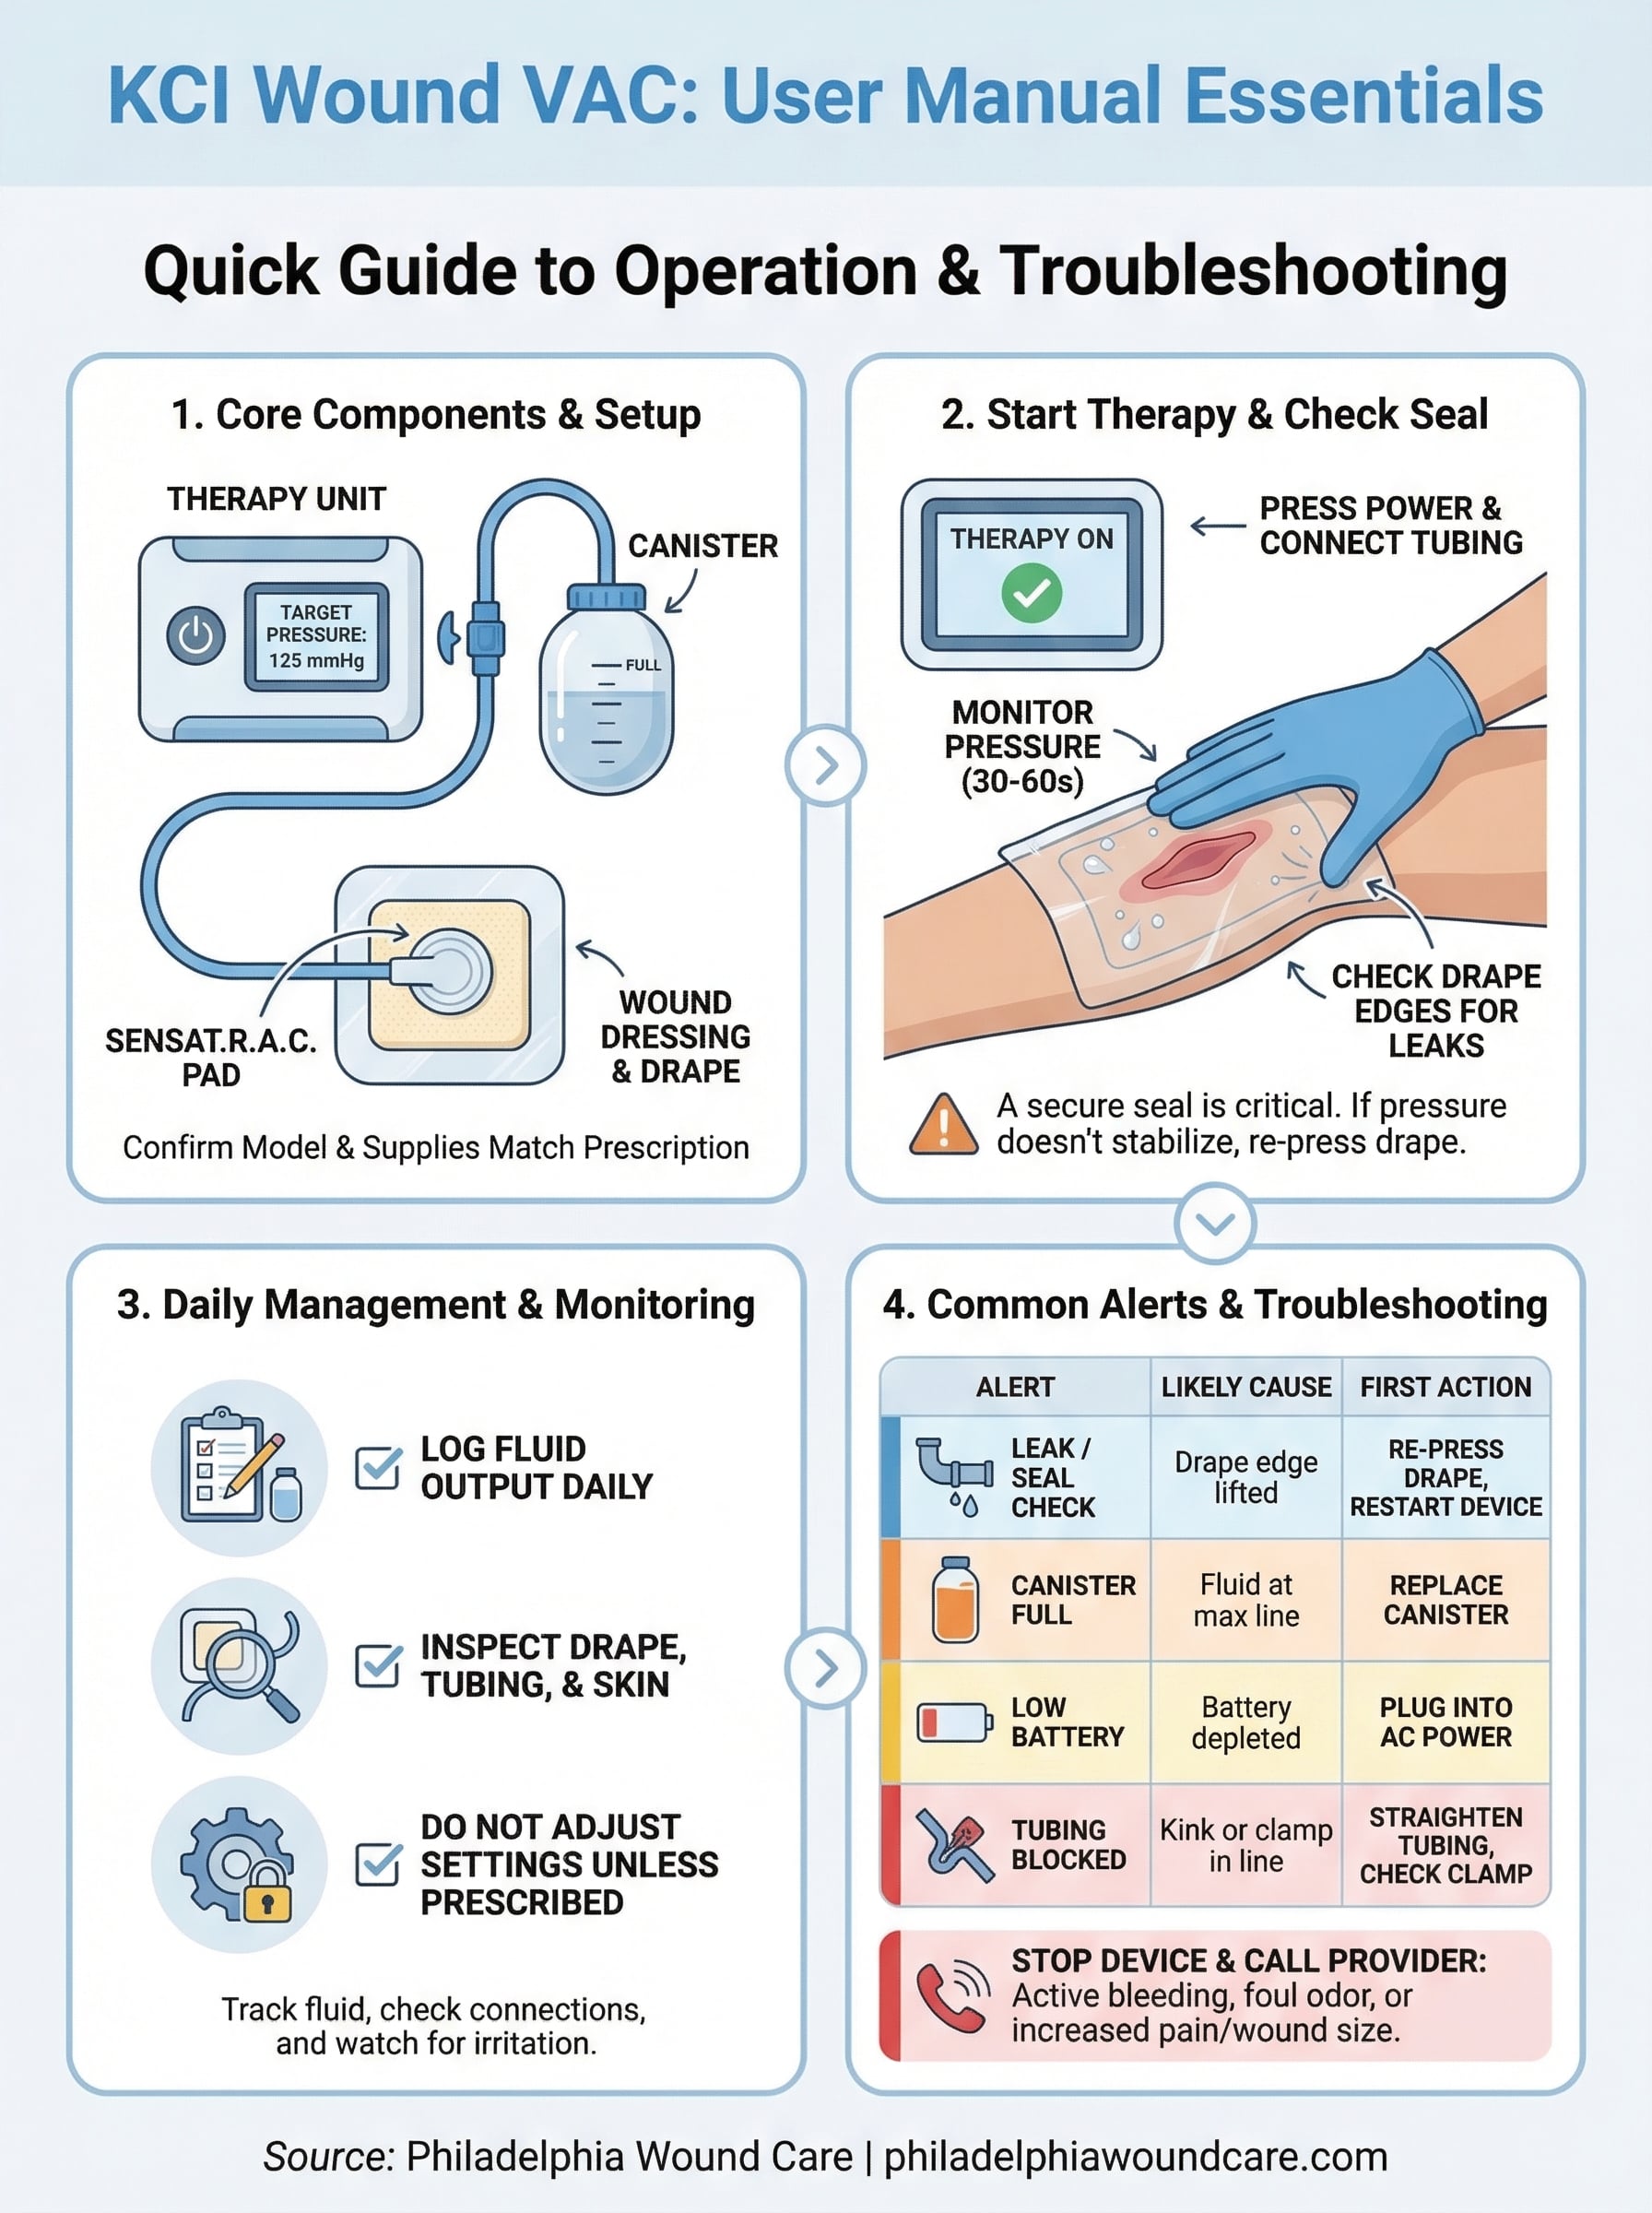
The table below covers the alerts you’ll encounter most often across KCI models. Your specific unit may use slightly different wording, so cross-reference with your manual.
| Alert displayed | Likely cause | First action |
|---|---|---|
| Leak / Seal check | Drape edge lifted | Re-press drape, restart device |
| Canister full | Fluid at max line | Replace canister |
| Low battery | Battery depleted | Plug into AC power |
| Tubing blocked | Kink or clamp in line | Straighten tubing, check clamp |
| Therapy interrupted | Multiple causes | Check display for secondary code |
When to stop the device and call your provider
Stop the device immediately if you see active bleeding at the wound site, smell an unusual odor from the canister, or notice the wound appears larger or more painful than your last dressing change.
When in doubt, turn off the device and contact your wound care provider before restarting therapy.
Next steps for safer wound VAC use
Using a KCI wound VAC at home is straightforward when you follow your prescribed settings, check the seal daily, and resolve alerts using the steps in this guide and your kci wound vac user manual. The most important habit you can build is consistent daily monitoring: log fluid output, inspect the drape edges, and note any changes in wound appearance before each session.
If your device keeps triggering the same alert, or if the wound looks different than it did at your last clinical visit, don’t keep restarting therapy and hoping it resolves on its own. Reach out to a wound care specialist who can evaluate the wound directly and adjust the care plan if needed. Philadelphia Wound Care provides physician-led mobile wound care throughout the Philadelphia area, bringing expert clinical oversight to your home or facility. Request a wound care consultation to get the right support without leaving your location.