

How to Build a Nursing Care Plan for Impaired Skin Integrity
Watching a patient’s skin break down under your care is stressful, especially when you know a solid plan could have caught it earlier. If you’re a nurse, caregiver, or case manager trying to build a nursing plan of care for impaired skin integrity, you need more than a checklist. You need a document that ties assessment findings to real interventions and tracks whether the wound is actually healing or getting worse under skin breakdown conditions like pressure, moisture, or poor circulation.
This guide walks you through exactly that. You’ll get the correct nursing diagnosis language, the assessment criteria that justify it, evidence-based interventions with rationales you can defend on a chart, and measurable outcomes that show progress instead of vague hope.
We wrote this from the field, where physicians make house calls to treat diabetic ulcers, pressure sores, and post-surgical wounds that stall without expert intervention. When a plan of care isn’t enough on its own, options like allograft therapy covered under Medicare Part B can move a stubborn wound toward closure. Use this framework to build a plan that actually protects your patient’s skin, not just paperwork that satisfies a survey.
What is impaired skin integrity in nursing care?
Impaired skin integrity means the skin’s outer layer, the epidermis, or the deeper dermis has been damaged or destroyed. NANDA International defines it as "altered epidermis and/or dermis," and that clinical distinction matters because it separates a surface abrasion from a wound that’s eating into fat, muscle, or bone. Nursing diagnosis language exists precisely so the whole care team, from the bedside nurse to the physician making a house call, reads the same severity from the chart without having to see the wound first.
Impaired skin integrity vs. impaired tissue integrity vs. risk for impaired skin integrity
Nurses mix these three up constantly, and the mix-up shows up in sloppy charting that won’t hold up during a survey or an insurance audit. Impaired skin integrity applies once you can document actual epidermal or dermal damage, like a stage 2 pressure injury or a surgical incision that’s dehisced. Impaired tissue integrity is the broader diagnosis you use when damage extends past skin into muscle, tendon, or subcutaneous tissue, which is common in stage 3 and 4 pressure ulcers. Risk for impaired skin integrity is a preventive diagnosis you write before any breakdown appears, based on risk factors alone, like a bedbound patient with a Braden Scale score under 18.
| Diagnosis | When to use it | Example patient |
|---|---|---|
| Risk for impaired skin integrity | No visible breakdown yet, but risk factors are present | Bedbound patient, incontinent, Braden score 14 |
| Impaired skin integrity | Actual damage limited to epidermis/dermis | Stage 2 pressure injury on the sacrum |
| Impaired tissue integrity | Damage extends beyond skin into deeper structures | Stage 4 pressure ulcer exposing muscle |
Getting this distinction right isn’t academic. Insurers and surveyors read the diagnosis code to judge whether your interventions match the severity you documented, and a mismatch can flag the whole chart for review.
Get the diagnosis right and every intervention that follows has a defensible reason for existing.
Common causes and risk factors behind skin breakdown
Skin doesn’t break down randomly. It fails under a predictable combination of pressure, moisture, friction, shear, and poor perfusion, and most patients you’ll write this care plan for have two or three of these stacked together. A diabetic patient with peripheral neuropathy and reduced sensation, for instance, can develop a heel ulcer from pressure they never felt building. An incontinent, bedbound resident in a skilled nursing facility faces moisture-associated skin damage on top of pressure risk, which is why so many sacral wounds in long-term care are actually a combination injury rather than a pure pressure ulcer.
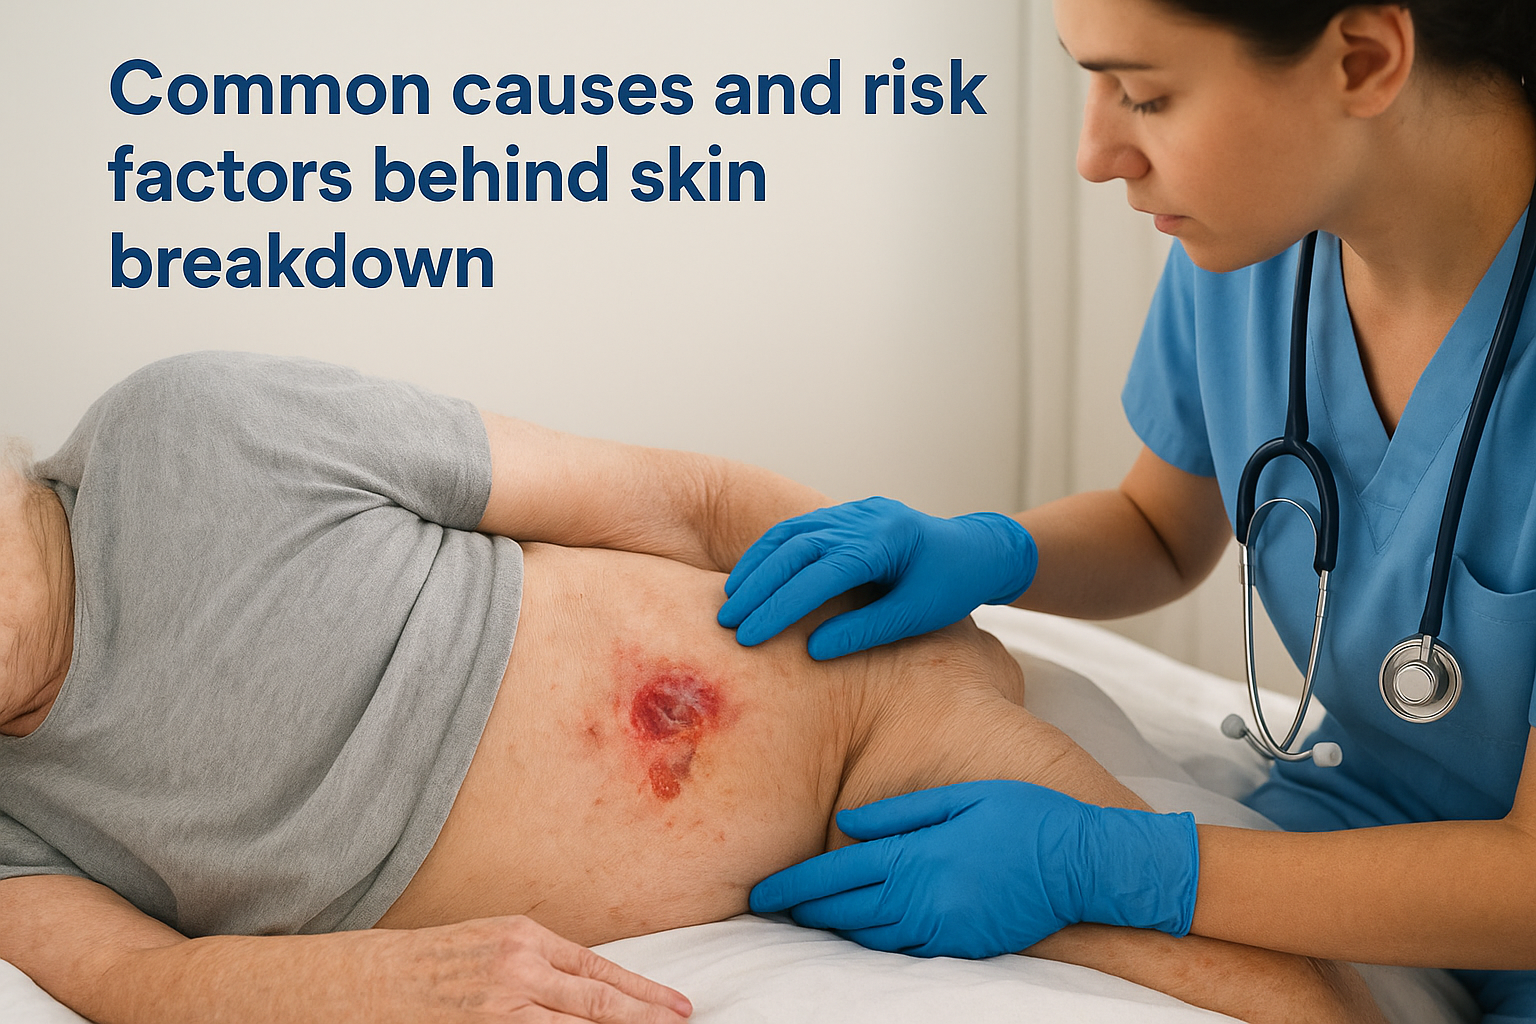
The risk factors nurses need to screen for every shift include:
- Immobility or limited mobility (bedbound, chair-bound, post-stroke, post-surgical)
- Incontinence (urinary or fecal, causing prolonged moisture exposure)
- Poor nutrition (low albumin, unintended weight loss, inadequate protein intake)
- Impaired circulation (diabetes, peripheral vascular disease, venous insufficiency)
- Sensory loss (neuropathy, spinal cord injury, altered level of consciousness)
- Advanced age (thinner skin, reduced subcutaneous fat, slower cell turnover)
- Friction and shear (sliding down in bed, improper transfer technique)
Every one of these becomes a "related to" factor you’ll cite when you write the formal diagnostic statement in the next step.
Why this diagnosis needs a formal care plan, not just wound dressings
Treating the wound in front of you without a written plan is how chronic wounds stay chronic. A wound care plan built around the nursing process forces you to connect the dots between why the skin broke down, what you’re doing about it, and how you’ll know it’s working. Skip that structure and you end up rotating through dressing changes without ever addressing the pressure redistribution, nutrition deficit, or moisture control that caused the wound in the first place. The Centers for Disease Control and Prevention notes that pressure injuries alone contribute to tens of thousands of preventable hospitalizations each year, which is a strong argument for treating the care plan as a clinical tool rather than paperwork you fill out after the fact. Build it right from the start, and the rest of this guide shows you exactly how.
Step 1. Assess the patient’s skin and risk factors
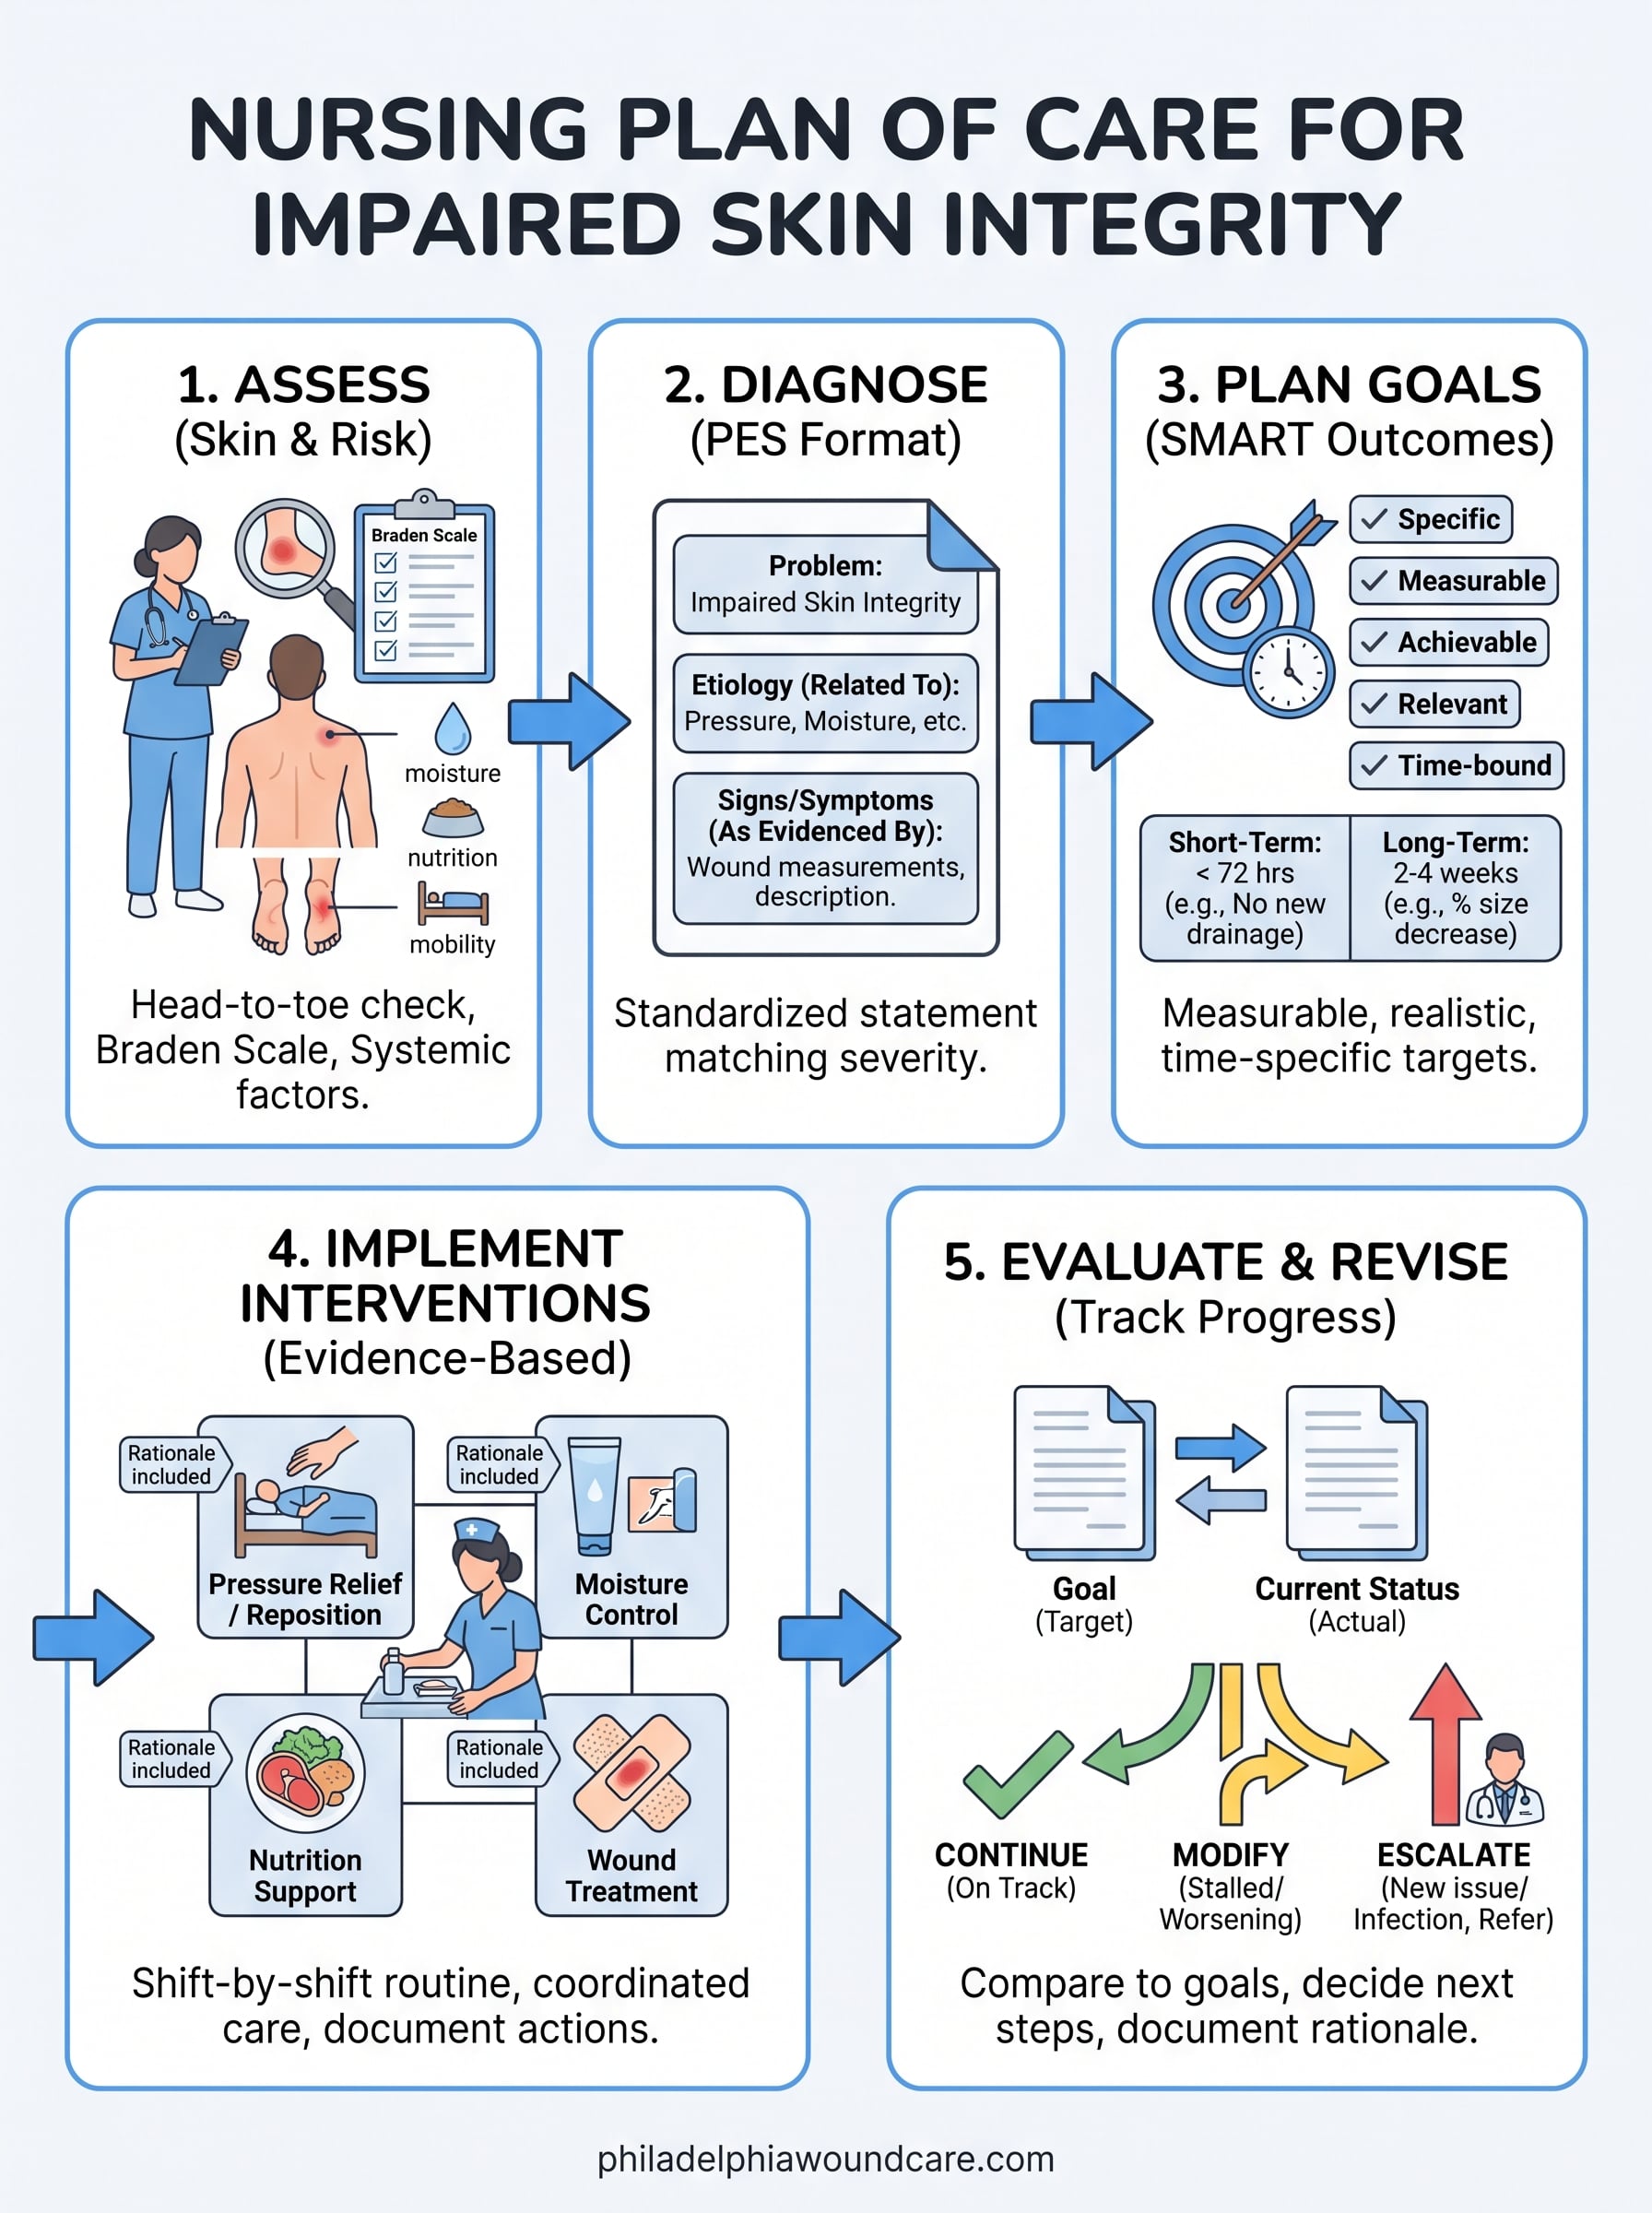
Every nursing plan of care for impaired skin integrity starts at the bedside, not the keyboard. You need a full-body skin check and a validated risk score before you write a single word of diagnosis, because the assessment is what justifies everything that follows. Skip this step or rush it, and you’ll end up with a plan that doesn’t match what’s actually happening on the patient’s skin.
Do a systematic head-to-toe skin inspection
Start at the scalp and work down, checking every pressure point: occiput, ears, shoulder blades, elbows, sacrum, hips, heels, and ankles. Pull back linens completely, and don’t skip skin folds under the breasts or abdomen, where moisture collects and breakdown hides. For each wound or suspicious area, document location, size in centimeters, depth, wound bed color, drainage amount and type, odor, and the condition of the surrounding skin. A wound that looks stable on day one but has increasing periwound erythema on day three is telling you the plan isn’t working, and you’ll only catch that if your first assessment was thorough enough to compare against.

A vague first assessment guarantees a vague care plan.
Apply a validated risk assessment tool
Don’t rely on clinical gut feeling alone. Use a standardized tool like the Braden Scale to score mobility, activity, sensory perception, moisture, nutrition, and friction/shear. The score gives you a defensible, reproducible number that other clinicians and surveyors can trust.
| Braden Scale score | Risk level | Typical action |
|---|---|---|
| 19-23 | No risk | Routine skin checks |
| 15-18 | Mild risk | Turning schedule, moisture management |
| 13-14 | Moderate risk | Support surface, nutrition consult |
| 10-12 | High risk | Frequent repositioning, specialty mattress |
| 9 or below | Severe risk | Full pressure injury prevention bundle |
Rescore on a set interval, typically every shift in acute care or weekly in home and long-term care settings, since risk changes fast with a new illness, surgery, or medication.
Gather the systemic risk factors that explain the wound
Beyond the skin itself, pull the labs and history that explain why breakdown is happening. Check albumin and prealbumin for nutritional status, HbA1c for diabetic patients, and recent weight trends. Review the medication list for steroids or anticoagulants that slow healing or increase bruising risk. Ask about continence status directly, since patients underreport it. This is also where you confirm mobility limitations, sensory deficits, and any history of prior wounds, because a patient who’s healed a similar ulcer before responds differently than one facing skin breakdown for the first time.
Once you’ve gathered inspection findings, a risk score, and the systemic factors behind them, you have everything you need to write a diagnosis that actually reflects the patient in front of you, which is exactly what the next step covers.
Step 2. Write the nursing diagnosis statement
Once your assessment is complete, you translate those findings into a formal nursing diagnosis statement. This is the sentence that appears at the top of the care plan and drives every goal and intervention that follows. Get the wording wrong and you risk a plan that doesn’t match the patient’s actual condition, which is a problem the first time a surveyor, auditor, or covering nurse reads the chart.
Use the PES format
Write the statement in three parts: Problem, Etiology, Signs/Symptoms, commonly called the PES format. The problem is the NANDA-approved label, such as "impaired skin integrity." The etiology is the "related to" clause, pulled directly from the risk factors you documented in Step 1. The signs and symptoms are the "as evidenced by" clause, listing the objective findings from your skin assessment. Skipping the evidence clause is the most common shortcut nurses take, and it’s the one that weakens the whole plan because there’s nothing tying the diagnosis to what you actually saw on the patient.
Impaired skin integrity related to prolonged pressure and moisture exposure
secondary to urinary incontinence and limited mobility,
as evidenced by a 3 cm x 2 cm stage 2 pressure injury on the sacrum
with serous drainage and surrounding erythema.
A diagnosis without the "as evidenced by" clause is an opinion, not a clinical finding.
Match the statement to severity
Before you finalize the wording, confirm you’re using the right diagnosis label from the comparison table in the previous section. A patient with an unstageable wound needs "impaired tissue integrity" language, not "impaired skin integrity," even if the surrounding assessment looks similar on paper. A patient with a Braden score of 12 but no visible breakdown yet needs "risk for impaired skin integrity," written without a signs/symptoms clause since none exist. Mismatching severity to diagnosis is exactly the kind of error that flags a chart for review, because the interventions you plan afterward won’t logically support a lower-severity label.
Write for multiple wounds or overlapping risk factors
Many patients you’ll see in home visits or skilled nursing facilities have more than one wound or more than one contributing cause, and the statement needs to reflect that without becoming an unreadable run-on sentence. Separate distinct wounds into their own diagnosis statements rather than combining a sacral pressure injury and a diabetic foot ulcer under one line, since they have different etiologies and different healing trajectories. Combine only the etiologies that genuinely apply to a single wound, such as pressure and moisture both contributing to one sacral injury. Reviewing the statement out loud with a colleague before you finalize it is a quick way to catch language that’s technically accurate but too dense for another clinician to act on quickly. With a clear, evidence-backed statement in place, you’re ready to attach measurable goals to it, which is what Step 3 covers.
Step 3. Set measurable goals and expected outcomes
A nursing diagnosis without a measurable outcome attached to it is just a label. This step turns your diagnosis statement into concrete, trackable targets that tell you and everyone else on the care team whether the plan is actually working. Vague goals like "wound will heal" or "skin will improve" don’t hold up on a chart because nobody can prove or disprove them at the next assessment. Expected outcomes need a number, a timeframe, and a clear sign of what success looks like.
Use SMART criteria to write the goal
Every outcome statement should be Specific, Measurable, Achievable, Relevant, and Time-bound. Specific means naming the exact wound and metric, not "the patient’s skin." Measurable means using centimeters, percentages, or a validated staging scale instead of words like "better" or "less." Achievable means setting a target realistic for that patient’s comorbidities, since a diabetic patient with poor perfusion won’t hit the same healing rate as a healthy post-surgical patient. Relevant ties the goal back to the etiology in your diagnosis statement. Time-bound gives it a deadline, whether that’s 72 hours, two weeks, or 30 days.
If you can’t measure it on your next visit, it isn’t a goal, it’s a hope.
Separate short-term and long-term outcomes
Goals split naturally into two tiers, and mixing them together makes the plan hard to evaluate. Short-term outcomes cover what should change within days, usually related to pain control, drainage reduction, or infection prevention. Long-term outcomes track the bigger picture, like wound closure or restored tissue integrity over weeks or months. Writing both tiers keeps the plan useful even when full healing is a distant target.
| Timeframe | Example outcome | Why it matters |
|---|---|---|
| 48-72 hours | Periwound erythema will decrease and no new drainage will appear | Catches early infection or continued pressure |
| 1-2 weeks | Wound surface area will decrease by 10-20% | Confirms the current treatment is working |
| 30 days | Wound will progress from stage 2 to fully epithelialized | Sets a realistic closure target for tracking |
| Ongoing | Patient/caregiver will demonstrate correct repositioning technique | Addresses the etiology, not just the wound |
Write outcomes that address the cause, not just the wound
Outcomes shouldn’t stop at wound measurements. Since your diagnosis statement named specific etiologies, like moisture exposure or immobility, at least one outcome should target that root cause directly. For a patient with a moisture-associated sacral injury, an outcome might read: "Caregiver will implement a toileting schedule and barrier cream application within 5 days, reducing incontinence-related skin exposure." Skin integrity outcomes that ignore the underlying cause tend to plateau, because you’re treating the symptom while the mechanism that created it keeps running in the background.
Anything you write in this step becomes the yardstick you’ll use in Step 6 to decide whether the plan is working or needs a rewrite, so keep every outcome specific enough that a colleague reading it cold could evaluate it without asking you for clarification.
Step 4. Select interventions and rationales
With goals set, you pick the actions that will actually get you there. Every nursing intervention on this plan needs a rationale attached, because "reposition every 2 hours" means nothing to a surveyor or a covering nurse unless you explain why that action addresses the etiology in your diagnosis statement. This step is where the plan stops being paperwork and starts being a working document someone can execute at the bedside.
Match interventions to the etiology, not just the wound
Generic wound care instructions treat symptoms. Strong interventions treat the cause you already named in Step 2. If your diagnosis lists moisture and immobility as contributing factors, your interventions need a line item for each one, not just a dressing order. A patient with pressure ulcer risk from immobility needs a documented turning schedule and a support surface assessment, while a patient with moisture-associated skin damage needs a toileting program and barrier cream protocol layered on top of the wound treatment itself. Skipping this match is how plans end up treating the hole in the skin while the mechanism that caused it keeps running unaddressed.
An intervention without a rationale is a task. An intervention with a rationale is evidence-based care.
Write the rationale in plain, defensible language
Every rationale should connect the action to a physiological or clinical reason, stated simply enough that another nurse can defend it on the spot. Avoid circular rationales like "turn patient to prevent skin breakdown" without naming the mechanism. Instead, write something like "reposition every 2 hours to relieve sustained pressure over bony prominences and restore capillary blood flow." That level of specificity is what separates a chart that survives an audit from one that doesn’t.
Intervention: Apply hydrocolloid dressing to sacral stage 2 pressure injury, change every 3 days or as needed for saturation.
Rationale: Maintains a moist wound environment that supports epithelialization while protecting the wound bed from external contamination.
Build the intervention list by category
Most plans need interventions spanning several categories at once. Organizing them this way keeps you from forgetting a domain, like nutrition, that doesn’t show up when you’re staring at the wound itself.
| Category | Sample intervention | Rationale |
|---|---|---|
| Pressure relief | Reposition every 2 hours, use pressure-redistribution mattress | Reduces sustained capillary occlusion over bony prominences |
| Moisture control | Barrier cream after each incontinence episode | Prevents maceration and secondary skin breakdown |
| Nutrition | Refer to dietitian, increase protein intake to 1.2-1.5 g/kg/day | Supports collagen synthesis and tissue repair |
| Wound treatment | Select dressing based on drainage and wound bed | Maintains moist healing environment, manages exudate |
| Circulation | Elevate legs for venous ulcers, monitor pulses for arterial wounds | Improves perfusion or prevents further ischemic damage |
| Education | Teach caregiver repositioning and skin checks | Extends prevention beyond scheduled nursing visits |
Once every intervention on this list has a rationale tied to the patient’s specific etiology, the plan is ready to move off the page and into daily practice, which is exactly what Step 5 covers.
Step 5. Implement the care plan at the bedside
A plan sitting in a binder does nothing for the patient’s skin. Implementation is where every assessment finding, diagnosis statement, and intervention you’ve written turns into action someone actually performs, on schedule, at the bedside or in the patient’s living room. This is also where plans fall apart fastest, usually because the paperwork was thorough but nobody translated it into a routine the care team could follow without re-reading the whole chart.
Turn interventions into a shift-by-shift routine
Break the intervention list from Step 4 into tasks tied to specific times, not vague frequencies like "as needed." A caregiver following "turn every 2 hours" needs a posted schedule, not a memory. Write the routine so anyone, including a family member with no clinical background, can follow it without guessing.

7 AM - Skin check, reposition, barrier cream if incontinent overnight
9 AM - Dressing change per protocol, document drainage and wound bed
11 AM - Reposition, offer protein-rich snack
1 PM - Reposition, check heels and elbows for pressure marks
3 PM - Reposition, toileting round
5 PM - Reposition, evening skin check
A care plan only works if the person at the bedside can follow it without calling you first.
Coordinate across every caregiver involved
Most patients with impaired skin integrity have more than one person touching their care, whether that’s rotating nursing shifts in a facility, a home health aide, and family members splitting responsibilities. Confusion between them is how repositioning gets skipped or a dressing change gets duplicated. Post the schedule somewhere visible, verbally hand off wound status at every shift change, and make sure the supervising physician or nurse practitioner gets notified immediately if something looks off, not at the next scheduled visit. For homebound patients, this is exactly where a mobile wound care physician adds value, since a house call can confirm whether a change in the wound bed needs a protocol adjustment before it becomes a hospital admission.
Document what actually happened, not what was planned
Charting needs to reflect reality, including missed interventions and why they were missed. If a patient refused repositioning or a dressing change happened late because of a scheduling gap, write it down. That documentation protects you legally and gives the next clinician an honest picture of what’s driving the wound’s trajectory. Skipping this step to make the chart look cleaner is one of the fastest ways to lose track of why a wound isn’t progressing the way your goals in Step 3 predicted.
Watch for barriers before they derail the plan
Supply shortages, caregiver fatigue, patient refusal, and cognitive decline all interrupt even a well-written plan. Flag these barriers as soon as they appear rather than waiting for the scheduled evaluation, since a delayed dressing supply or a caregiver who can’t manage a turning schedule alone needs a workaround now, not next week. Consistent implementation is what makes the evaluation in Step 6 meaningful instead of a guessing game about whether the plan or the execution failed.
Step 6. Evaluate progress and revise the plan
Evaluation is where you find out if everything you built in Steps 1 through 5 actually worked, and it needs a set date, not a vague "check back later." Return to the measurable outcomes you wrote in Step 3 and compare them line by line against what the wound looks like today. A plan that never gets formally evaluated just drifts, and drifting is how a stalled wound turns into a hospital admission three weeks later.
Compare wound measurements against your goals
Remeasure length, width, depth, and drainage using the same method you used at the initial assessment, since switching measurement techniques mid-plan makes trends impossible to trust. Rescore the Braden Scale too, because a patient’s risk level shifts with new illness, medication changes, or improved mobility, and the plan needs to reflect the current number, not the one from admission. Line the new findings up against the timeframe you set, whether that was 72 hours, two weeks, or 30 days, and be honest about whether the wound met, partially met, or missed the target.
A plan that never gets formally evaluated just drifts toward a bigger problem.
Decide whether to continue, modify, or discontinue
Every evaluation ends in one of three decisions, and the wound data you just gathered should point clearly to which one applies.
| Finding at evaluation | Decision | Example change |
|---|---|---|
| Wound is smaller, drainage decreasing, goal on track | Continue current plan | Keep dressing protocol, recheck in 1 week |
| Wound unchanged or worsening, no new complicating factor | Modify plan | Switch dressing type, add nutrition consult, reassess support surface |
| New infection, undermining, or tunneling appears | Escalate | Refer to wound care physician, consider advanced therapy |
| Goal fully met, wound closed | Discontinue diagnosis | Document closure, shift to prevention plan |
Guessing at this step defeats the purpose of writing measurable goals in the first place, so let the numbers make the decision rather than optimism about a patient you’ve grown attached to.
Document the revision and rationale for change
However you revise the plan, write down why. "Changed dressing from foam to alginate due to increased serous drainage and no improvement in wound depth after 10 days" gives the next clinician the clinical reasoning, not just a new order. Revisit the diagnosis statement itself if the etiology has shifted, since a wound that started as pressure-related but is now complicated by infection needs updated language, not just a new dressing order layered on top of an outdated diagnosis. Keeping this revision trail intact is also what protects you if a surveyor or insurer questions why treatment changed midway through the plan.
Stubborn wounds that plateau despite a well-executed plan are exactly where advanced options like allograft therapy, covered under Medicare Part B, become worth discussing with a physician who can assess the wound bed in person rather than continuing to modify dressings indefinitely.
Sample care plans for common wound scenarios
Seeing the whole framework applied to real cases makes it easier to adapt for your own patient. Below are three condensed sample care plans built from the steps above, covering the wound types you’ll encounter most often in home visits and skilled nursing facilities. Use these as templates, not scripts, since every patient’s etiology and comorbidities will shift the specifics.
Diabetic foot ulcer care plan
A diabetic foot ulcer almost always involves neuropathy and impaired circulation working together, which is why the diagnosis and interventions need to address both, not just the open wound on the plantar surface.
Diagnosis: Impaired skin integrity related to peripheral neuropathy and
impaired arterial circulation secondary to diabetes mellitus, as evidenced
by a 2 cm x 2 cm plantar ulcer with minimal drainage and callused edges.

Short-term goal: Wound will show no signs of infection within 72 hours.
Long-term goal: Wound surface area will decrease by 30% within 4 weeks.

Interventions:
- Offload pressure with a total contact cast or offloading shoe
- Check blood glucose trends and coordinate with primary care on HbA1c control
- Assess pedal pulses and capillary refill each visit
- Debride callused edges as ordered
A diabetic wound that ignores glucose control and offloading will not close, no matter how good the dressing is.
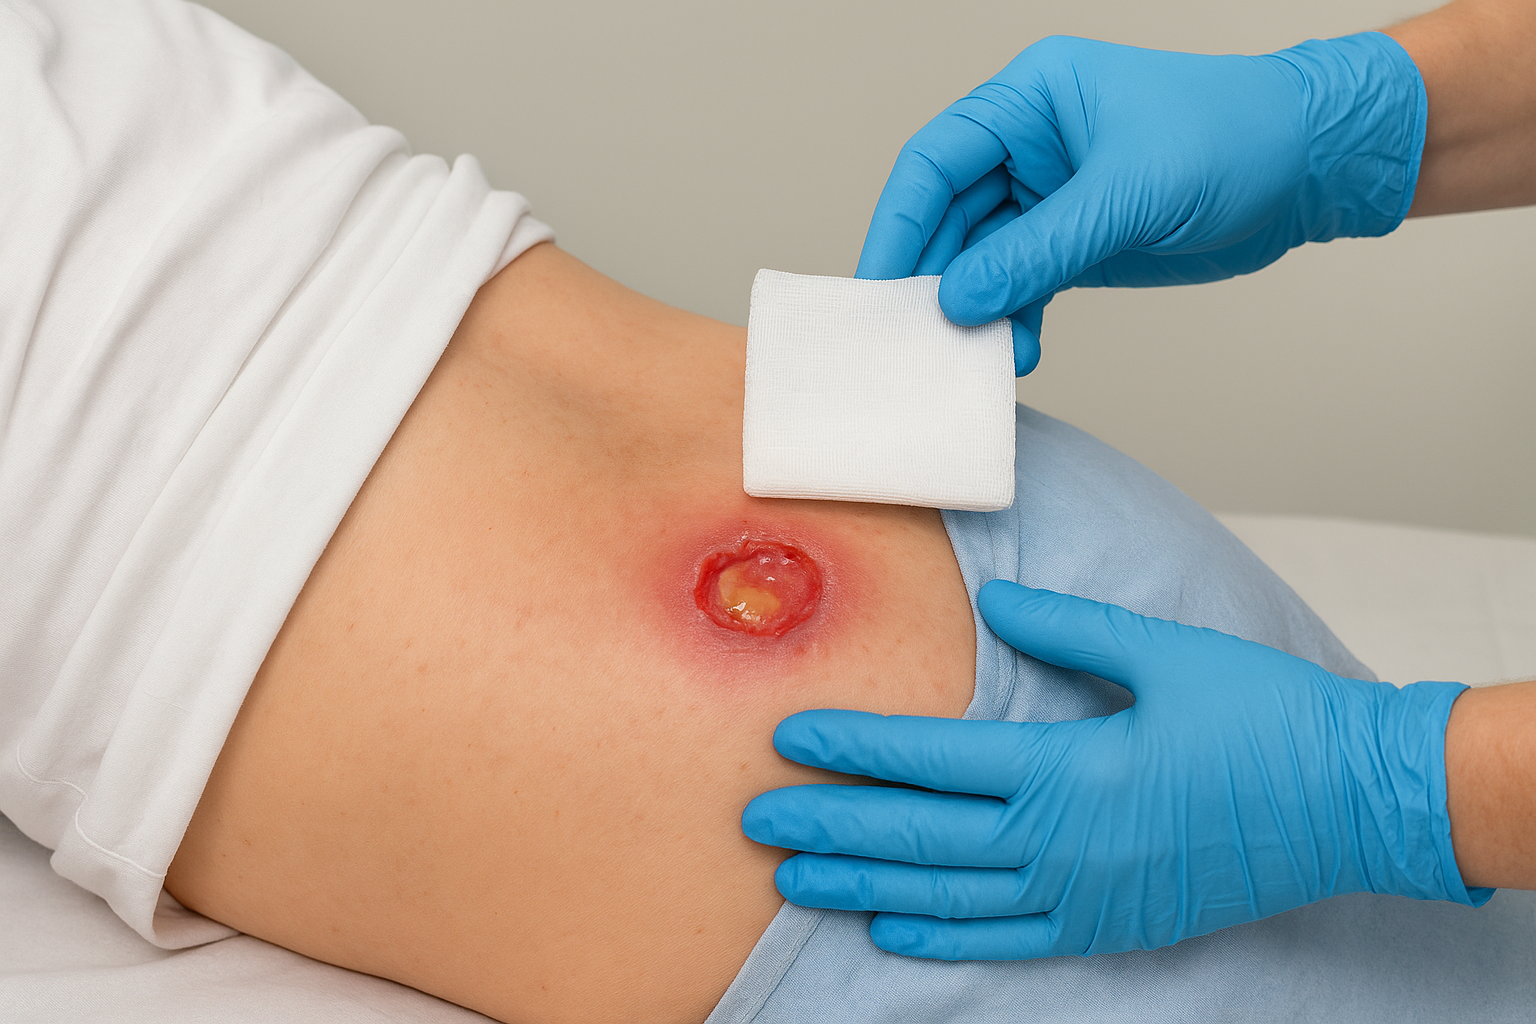
Sacral pressure injury care plan
Pressure injuries respond fastest when the plan attacks pressure, moisture, and shear at the same time instead of relying on a single dressing change.
| Element | Detail |
|---|---|
| Diagnosis | Impaired skin integrity related to prolonged pressure and shear secondary to immobility, as evidenced by a stage 2 sacral injury, 3 cm x 2 cm, serous drainage |
| Short-term goal | No increase in wound size or drainage within 1 week |
| Long-term goal | Wound progresses to fully epithelialized within 6 weeks |
| Key interventions | Turning schedule every 2 hours, pressure-redistribution mattress, hydrocolloid dressing, nutrition referral for protein intake |
Repositioning documentation matters here more than in almost any other wound type, since a missed turn is the single most common reason a sacral injury stalls.
Venous ulcer care plan
Venous ulcers heal on a different mechanism than pressure or diabetic wounds, so compression therapy becomes the central intervention rather than an afterthought.
Diagnosis: Impaired skin integrity related to venous insufficiency and
dependent edema, as evidenced by a 4 cm x 3 cm medial ankle ulcer with
moderate serous drainage and surrounding hemosiderin staining.

Goals: Edema decreases within 2 weeks; wound surface area decreases
20% within 30 days.

Interventions:
- Apply compression bandaging per physician order
- Elevate legs above heart level when seated or in bed
- Monitor for signs of arterial insufficiency before applying compression
- Educate patient on activity and elevation routine between visits
Thinking through these three scenarios side by side shows why one generic template never fits every wound. The diagnosis language, goals, and interventions shift with the etiology, and matching that etiology correctly is still the single most important thing you do before writing a word of the plan.
Making the care plan work in practice
A strong nursing plan of care for impaired skin integrity only matters if someone follows it consistently, shift after shift, visit after visit. Build the assessment honestly, write the diagnosis with real evidence behind it, and set outcomes you can actually measure, then let those numbers, not optimism, drive every revision. Documentation and consistent execution close more wounds than any single dressing choice ever will.
But some wounds plateau no matter how well the plan is executed, and that’s not a failure of your charting. It’s a sign the wound needs physician-level intervention, like allograft therapy or a hands-on reassessment of the wound bed. If you’re managing a patient in Philadelphia whose wound isn’t responding the way your goals predicted, don’t keep modifying dressings alone. Refer your patient for mobile wound care and get a physician evaluating the wound where the patient actually lives.