
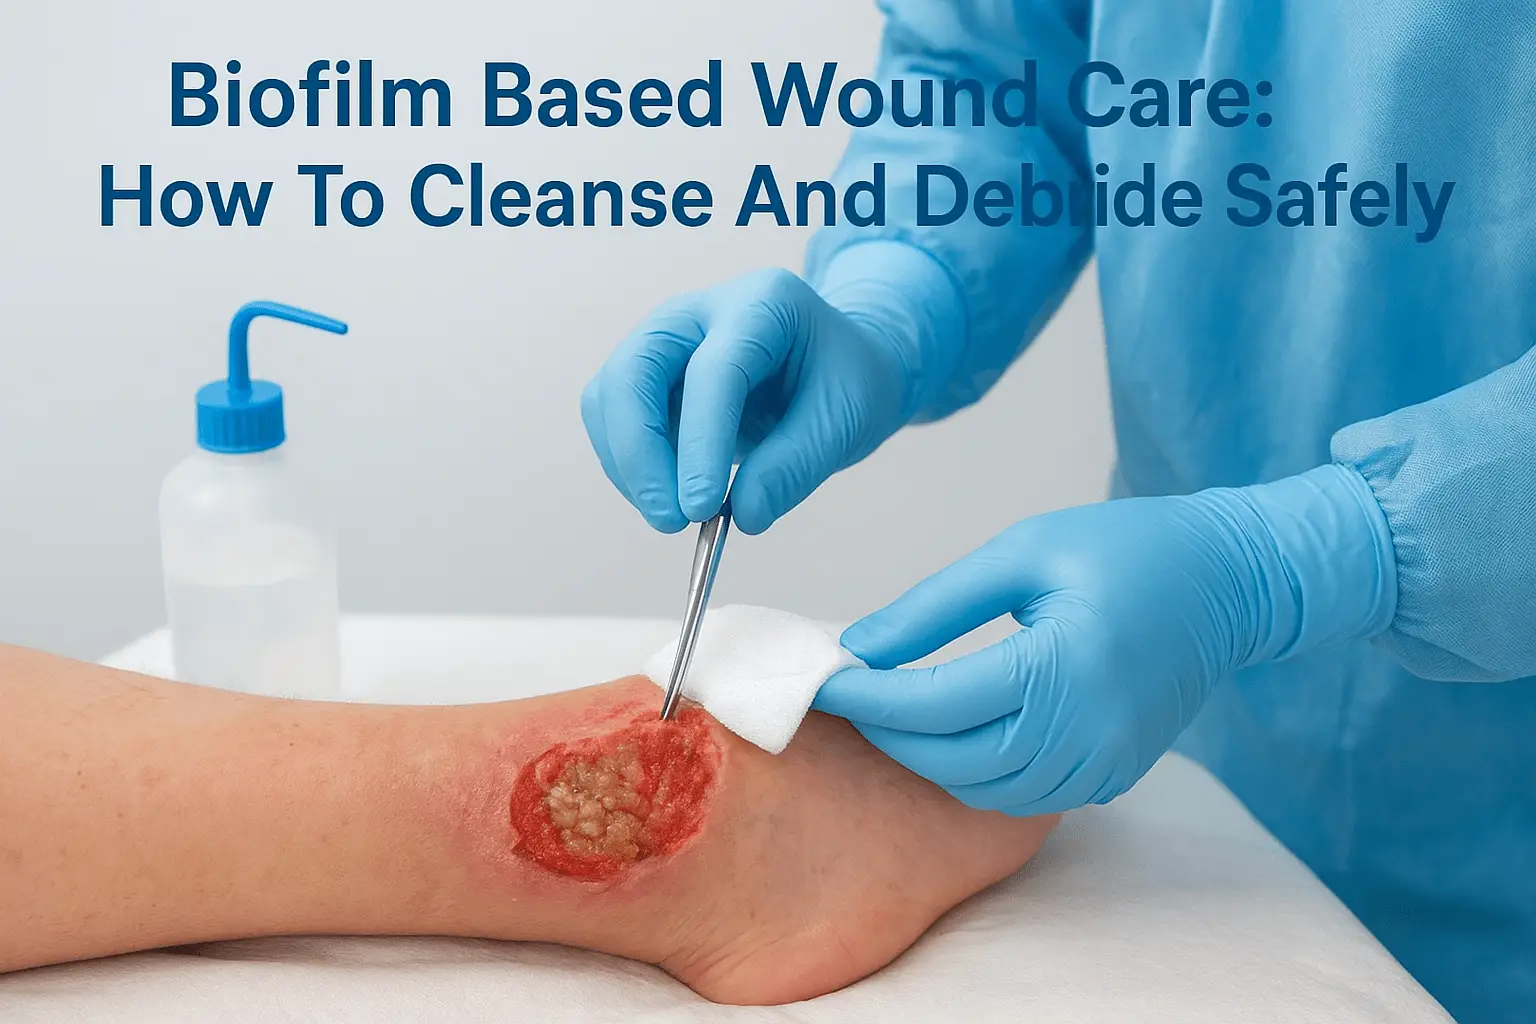
Biofilm Based Wound Care: How To Cleanse And Debride Safely
A chronic wound that refuses to heal despite consistent treatment is one of the most frustrating challenges in wound management. In many cases, the culprit isn’t a lack of effort, it’s an invisible layer of biofilm protecting bacteria from both the immune system and topical therapies. Biofilm based wound care addresses this problem head-on by shifting the clinical focus from simply treating infection to systematically disrupting the microbial communities embedded in the wound bed.
Research estimates that biofilm is present in up to 80% of chronic wounds, including diabetic ulcers, pressure injuries, and venous leg ulcers. Standard cleaning alone won’t remove it. That’s why a structured approach, combining thorough cleansing, targeted debridement, and appropriate antimicrobial application, has become the evidence-based standard for managing non-healing wounds.
At Philadelphia Wound Care, our physician-led mobile practice brings advanced wound management directly to patients across the Philadelphia area, whether they’re at home, in a skilled nursing facility, or in hospice care. We see firsthand how biofilm stalls healing in the very populations most vulnerable to chronic wounds, and how the right intervention strategy breaks that cycle.
This guide walks through the core steps of biofilm-based wound care, from identifying biofilm presence to performing safe debridement and selecting effective antimicrobial agents. Each step is grounded in current clinical evidence and designed to give caregivers, clinicians, and referring providers a practical framework they can apply at the bedside.
Understand biofilm and why wounds stall
When a wound doesn’t close despite weeks of dressing changes and topical treatments, biofilm is often the reason hiding in plain sight. Biofilm isn’t a simple infection in the traditional sense; it’s a structured community of bacteria that attaches to the wound surface and encases itself in a self-produced matrix of polysaccharides, proteins, and extracellular DNA. That matrix acts as a physical shield, protecting the bacteria from antibiotics, antiseptics, and your patient’s immune response. Understanding this mechanism is the foundation of any effective biofilm based wound care strategy, and it changes how you approach every step of wound management.
What biofilm looks like and how it forms
Biofilm development follows a predictable sequence that begins within hours of a wound forming. Free-floating (planktonic) bacteria land on the wound surface, attach, and start producing the extracellular matrix that anchors them in place. Within 24 to 48 hours, early biofilm colonies establish. By 72 hours, a mature biofilm structure is present, and those bacteria are up to 1,000 times more resistant to antibiotic treatment than their free-floating counterparts. You won’t always see biofilm clearly; it can appear as a slippery, glassy film on the wound bed, often mistaken for slough, or it may be completely invisible to the naked eye.
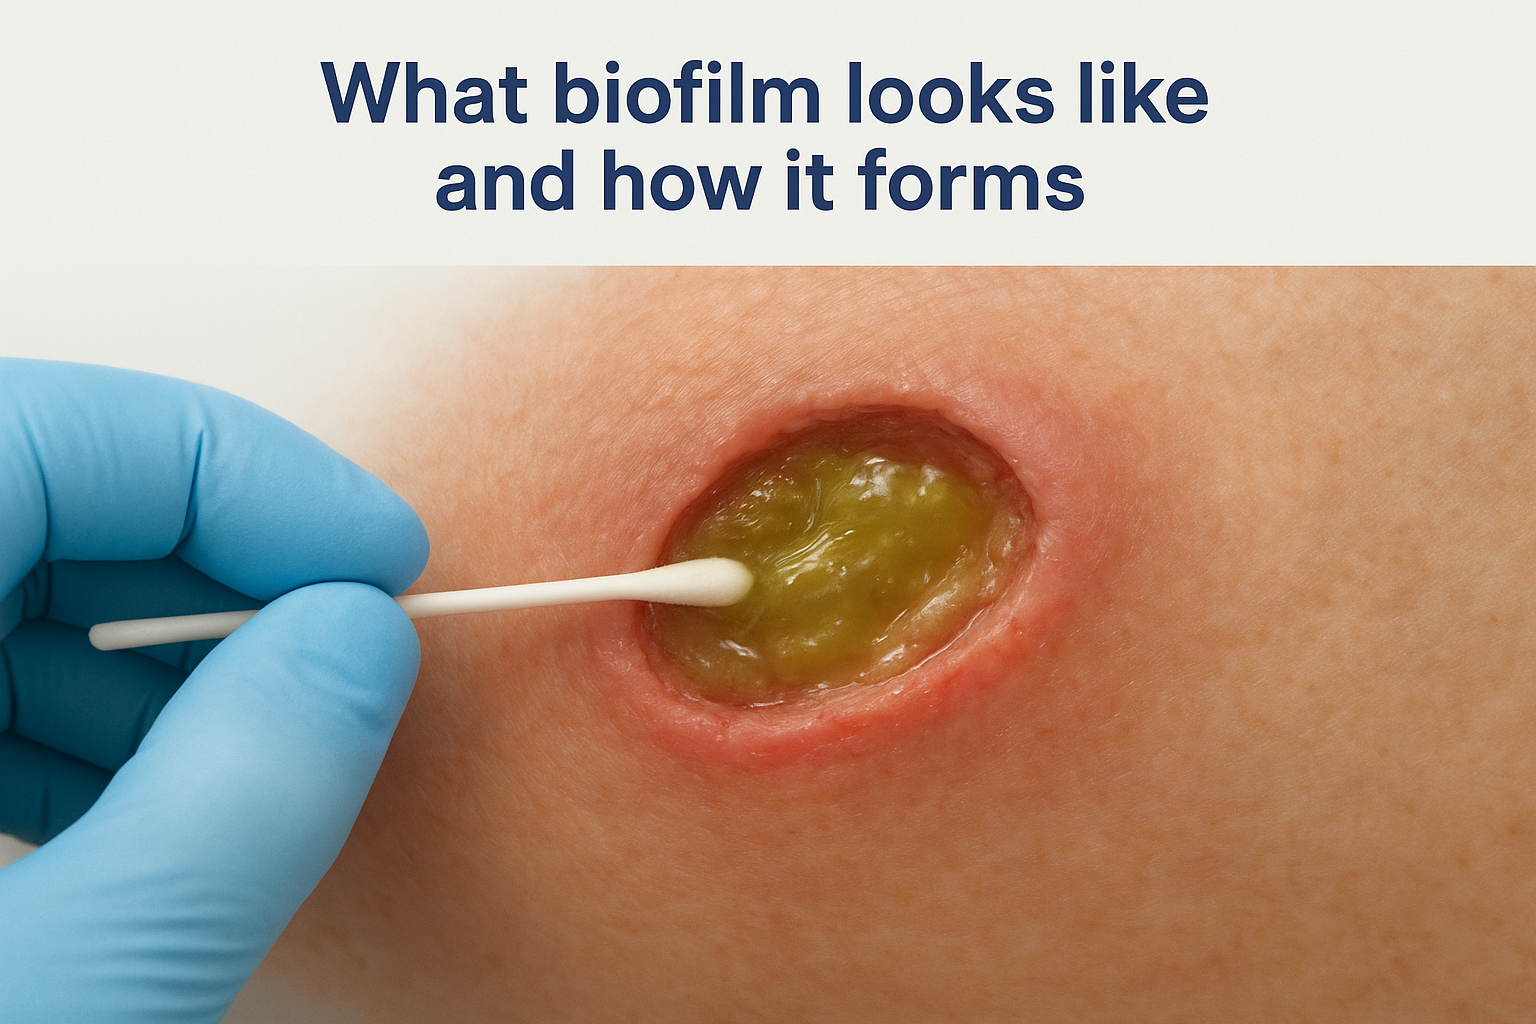
Mature biofilm can form in as little as 72 hours, which makes early and repeated debridement critical to preventing re-establishment between visits.
Biofilm is most common in chronic, non-healing wounds, including diabetic foot ulcers, venous leg ulcers, pressure injuries, and wounds that have plateaued after surgical intervention. The patients most likely to carry a significant biofilm burden are also the ones with the least physiological reserve: elderly individuals, those with poorly controlled diabetes, and patients with compromised vascular supply or immune function. These are exactly the patients who need a structured approach rather than routine dressing changes.
Why standard treatments miss biofilm
Routine wound care, such as saline rinse and gauze dressing changes, was not designed with biofilm in mind. Standard cleansing disrupts planktonic bacteria effectively but leaves sessile biofilm colonies largely intact. Topical antibiotics face the same limitation; the extracellular matrix blocks adequate drug penetration, so subtherapeutic concentrations reach the bacteria inside, which accelerates resistance without clearing the colony. This is why a wound can test negative for clinical infection by standard criteria and still carry a biofilm burden that prevents healing.
| Treatment Type | Effect on Planktonic Bacteria | Effect on Mature Biofilm |
|---|---|---|
| Saline irrigation | Effective | Minimal disruption |
| Topical antibiotics | Effective | Poor penetration, resistance risk |
| Antiseptic dressings (PHMB, cadexomer iodine) | Effective | Moderate disruption with repeated use |
| Mechanical debridement | Effective | Significant disruption if thorough |
Recognizing this gap is what prompted the shift toward dedicated biofilm disruption protocols in modern wound care guidelines. Cleansing alone is not sufficient once biofilm is established.
How biofilm drives the stalled wound cycle
Biofilm triggers persistent low-grade inflammation at the wound site. Your patient’s immune system recognizes the bacterial presence and deploys neutrophils and macrophages, but these cells cannot penetrate the biofilm matrix effectively. Instead, they release proteases and reactive oxygen species in an attempt to destroy the infection, and those same molecules degrade the growth factors and extracellular matrix proteins the wound needs to close. The result is a wound locked in the inflammatory phase, generating exudate and tissue breakdown rather than new granulation tissue.
Patients caught in this cycle typically present with elevated, malodorous exudate, wound bed deterioration, no measurable reduction in wound size over four weeks, and increasing periwound inflammation. Spotting this pattern early gives you the opportunity to shift strategy before the wound deteriorates further. That clinical pivot, from passive maintenance to active biofilm disruption, is what the steps in this guide are built around.
Use a biofilm-based plan safely
The steps in this guide follow the wound hygiene framework, a structured clinical approach that combines cleansing, debridement, and antimicrobial therapy into a repeatable cycle. Each component builds on the last. Applying them in sequence, and at the right frequency, is what separates biofilm based wound care from routine maintenance dressing changes that leave the underlying microbial community intact.
Know the core principles before you start
Biofilm re-establishes rapidly after disruption. Research shows that mature biofilm can regrow within 72 hours of mechanical removal, which means your intervention frequency matters as much as your technique. A single debridement followed by weeks of passive dressings gives the biofilm colony time to rebuild fully before your next visit. You need to plan for repeated, scheduled disruption at intervals your patient’s wound and clinical situation can support.
Your wound hygiene cycle relies on four actions repeated in order: cleanse, debride, apply antimicrobial, and reassess. Every step in this guide maps to one of those four actions. Before you begin, confirm you have the appropriate tools on hand, including your chosen irrigant, debridement instruments, and antimicrobial dressing, so you can complete the full sequence in a single session rather than splitting steps across visits.
Splitting the wound hygiene steps across separate visits reduces their effectiveness because biofilm begins to re-establish the moment active disruption stops.
Know when to stop and refer
Some wound presentations fall outside the scope of bedside management. If your patient shows signs of systemic infection, including fever, elevated white cell count, red streaking beyond the wound margin, or sepsis indicators, the wound needs hospital-level evaluation before any local debridement proceeds. Attempting aggressive debridement in a patient with uncontrolled systemic infection can drive bacteria deeper into tissue and worsen the clinical picture.
Wounds with poor vascular supply also require vascular assessment before sharp debridement. Removing necrotic tissue from an ischemic limb without ensuring adequate blood flow creates an open injury that cannot heal and carries a high amputation risk. Confirming wound healability is the first step in this guide for exactly that reason, and skipping it is a clinical safety issue, not a procedural shortcut.
Step 1. Check if the wound is healable and urgent
Before you cleanse or debride anything, confirm the wound can actually heal with the resources available to you. Skipping this assessment is the most common clinical error in biofilm based wound care because aggressive debridement in a non-healable wound causes harm rather than progress. A wound is considered healable when the underlying cause can be corrected, perfusion to the wound site is adequate, and the patient has enough physiological reserve to generate new tissue.
Assess wound healability
Use three questions to guide your assessment before touching the wound bed. First, can the cause be corrected? A venous ulcer is healable if compression therapy is applied and maintained; a diabetic foot ulcer is healable if offloading is consistent and glycemic control improves. Second, does the wound have adequate perfusion? Use ankle-brachial index (ABI) measurements or clinical signs like capillary refill, skin temperature, and presence of pedal pulses to gauge blood flow before proceeding. Third, does the patient’s systemic health support healing? Severe malnutrition, uncontrolled infection, or active immunosuppression all reduce healing capacity and require co-management before local wound therapy can be effective.
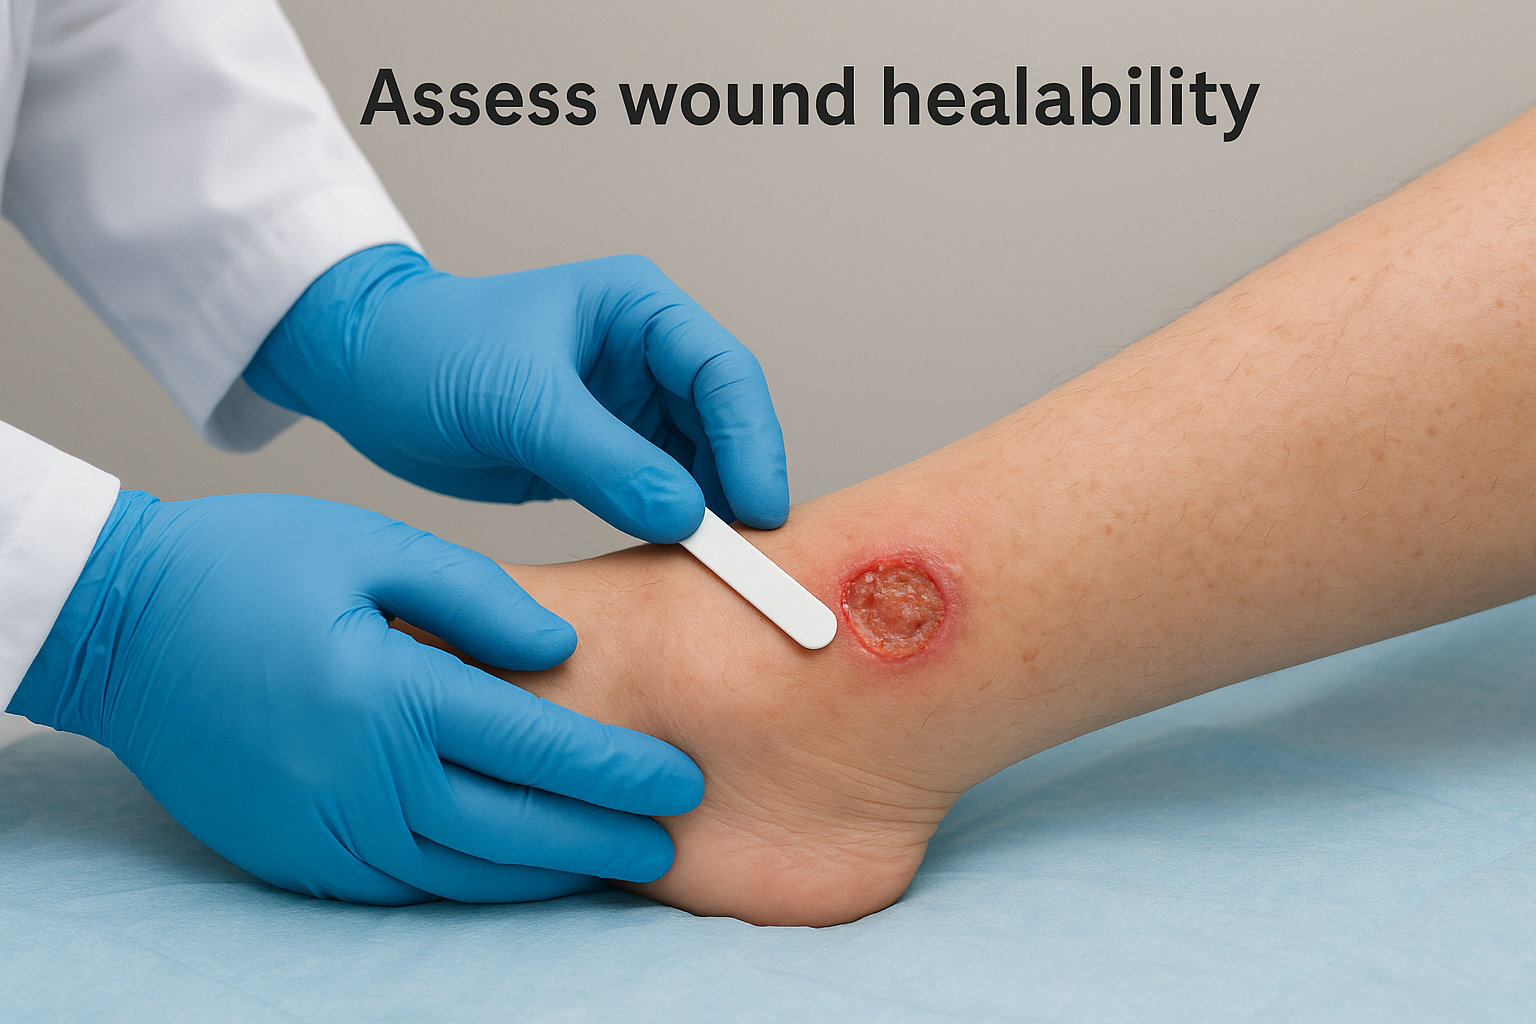
A wound classified as non-healable should receive symptom management and infection prevention rather than active debridement aimed at closure.
If all three conditions are met, proceed through the full biofilm disruption cycle. If one or more conditions are unmet, address the underlying barrier first and document your findings clearly, so the entire care team understands the rationale for any change in approach. This documentation step protects your patient and creates a clear record of clinical decision-making for referring physicians and facility staff.
Identify urgent presentations
Some wounds need escalation before any local treatment starts. Check your patient carefully for the following signs that require immediate referral rather than bedside management:
- Systemic infection indicators: fever above 38°C, rigors, elevated heart rate, or altered mental status
- Rapid wound deterioration: significant increase in wound size, depth, or undermining since the last visit
- Red streaking or cellulitis extending more than 2 cm beyond the wound margin
- Exposed bone, tendon, or joint capsule, which raises immediate concern for osteomyelitis
- Critical limb ischemia signs: rest pain, pallor, or absent pulses in a wound-bearing limb
When any of these are present, stop all local wound treatment and contact the referring physician or direct the patient to an emergency setting. Attempting debridement in an unstable patient increases the risk of driving bacteria deeper into tissue without improving outcomes. Once the urgent issue is stabilized, return to this step and reassess healability before moving forward.
Step 2. Get ready for cleansing and pain control
Preparation determines how well the rest of your biofilm based wound care session goes. If you pause mid-procedure to locate supplies or wait for an analgesic to take effect, you break the workflow and give the patient unnecessary discomfort. Before you open any dressing, have every supply you need within arm’s reach and confirm your pain management plan is already in motion.
Gather your supplies before you start
Organizing your materials in advance keeps the session moving without interruption. Incomplete preparation forces you to leave the bedside, increases contamination risk, and lengthens the time the wound is exposed. Lay out each item in the order you will use it so nothing gets missed under time pressure.
Use this checklist before every wound care session:
- Irrigation syringe (35 mL) and 18-gauge angiocath or splash guard for controlled fluid delivery
- Wound cleanser or irrigant appropriate for the wound type (e.g., polyhexanide solution, normal saline, or hypochlorous acid)
- Debridement instruments (curette, scalpel, or monofilament pad depending on your planned method)
- Sterile gloves, drapes, and absorbent pad to protect the periwound and patient’s clothing
- Antimicrobial dressing selected before the session, not after debridement
- Wound measurement tools (ruler or wound tracing film) for post-debridement documentation
- Sharps container and waste bag positioned within reach
Manage pain before you touch the wound
Pain during wound care reduces patient cooperation, increases procedural anxiety, and can cause guarding that physically limits your access to the wound bed. Address it before the session starts rather than responding to distress once you have already begun. For most patients at home or in a facility, topical lidocaine gel or spray applied 20 to 30 minutes before debridement provides sufficient local analgesia for bedside procedures.
For patients with consistently high pain scores or anxiety, coordinate with the referring physician to schedule a short-acting oral analgesic at an appropriate interval before your visit. Document the agent used, the dose, the time administered, and the patient’s reported pain level before and after the procedure at every session.
Undertreated procedural pain leads to patients refusing future wound care visits, which breaks the treatment cycle and allows biofilm to re-establish unchecked.
Position your patient comfortably with the wound fully accessible and well-lit before you start. A stable, relaxed patient tolerates the procedure better and allows you to complete debridement thoroughly rather than cutting it short.
Step 3. Cleanse the wound and periwound thoroughly
Cleansing is the first active disruption step in biofilm based wound care, and how you do it determines how much biofilm you remove before debridement begins. The goal is not simply to rinse visible debris off the wound surface; it is to mechanically break apart the loose, superficial layer of biofilm and reduce the bacterial load in the wound bed and surrounding skin before you introduce any instrument.
Choose the right irrigant for the wound condition
Not every irrigant works equally well against biofilm. Normal saline is safe and non-toxic, but it has no direct antimicrobial or biofilm-disrupting activity. For wounds with confirmed or suspected biofilm, select an irrigant with documented antimicrobial and antibiofilm properties, such as polyhexanide (PHMB) solution or hypochlorous acid solution. Both are widely available, compatible with granulating tissue, and supported in wound care guidelines for repeated use.
Use this reference table to match your irrigant choice to the wound presentation:
| Wound Status | Recommended Irrigant | Notes |
|---|---|---|
| Clean, healing wound | Normal saline | Safe for all tissue types |
| Suspected or confirmed biofilm | PHMB solution | Allow 15-min contact time before rinsing |
| Malodorous, high bacterial load | Hypochlorous acid solution | Can be used at each visit |
| Fragile periwound skin | Normal saline or gentle PHMB | Avoid strong antiseptics near macerated skin |
Apply irrigation technique correctly
Irrigation pressure matters as much as the solution you select. Research supports a delivery pressure of 8 to 15 psi to effectively dislodge surface biofilm without driving bacteria deeper into tissue. Achieve this consistently by using a 35 mL syringe fitted with an 18-gauge angiocath or splash guard, held approximately 2 to 4 cm from the wound surface. Squeeze the plunger with firm, steady pressure and work systematically from the wound center outward, covering the entire wound bed and any undermined edges.
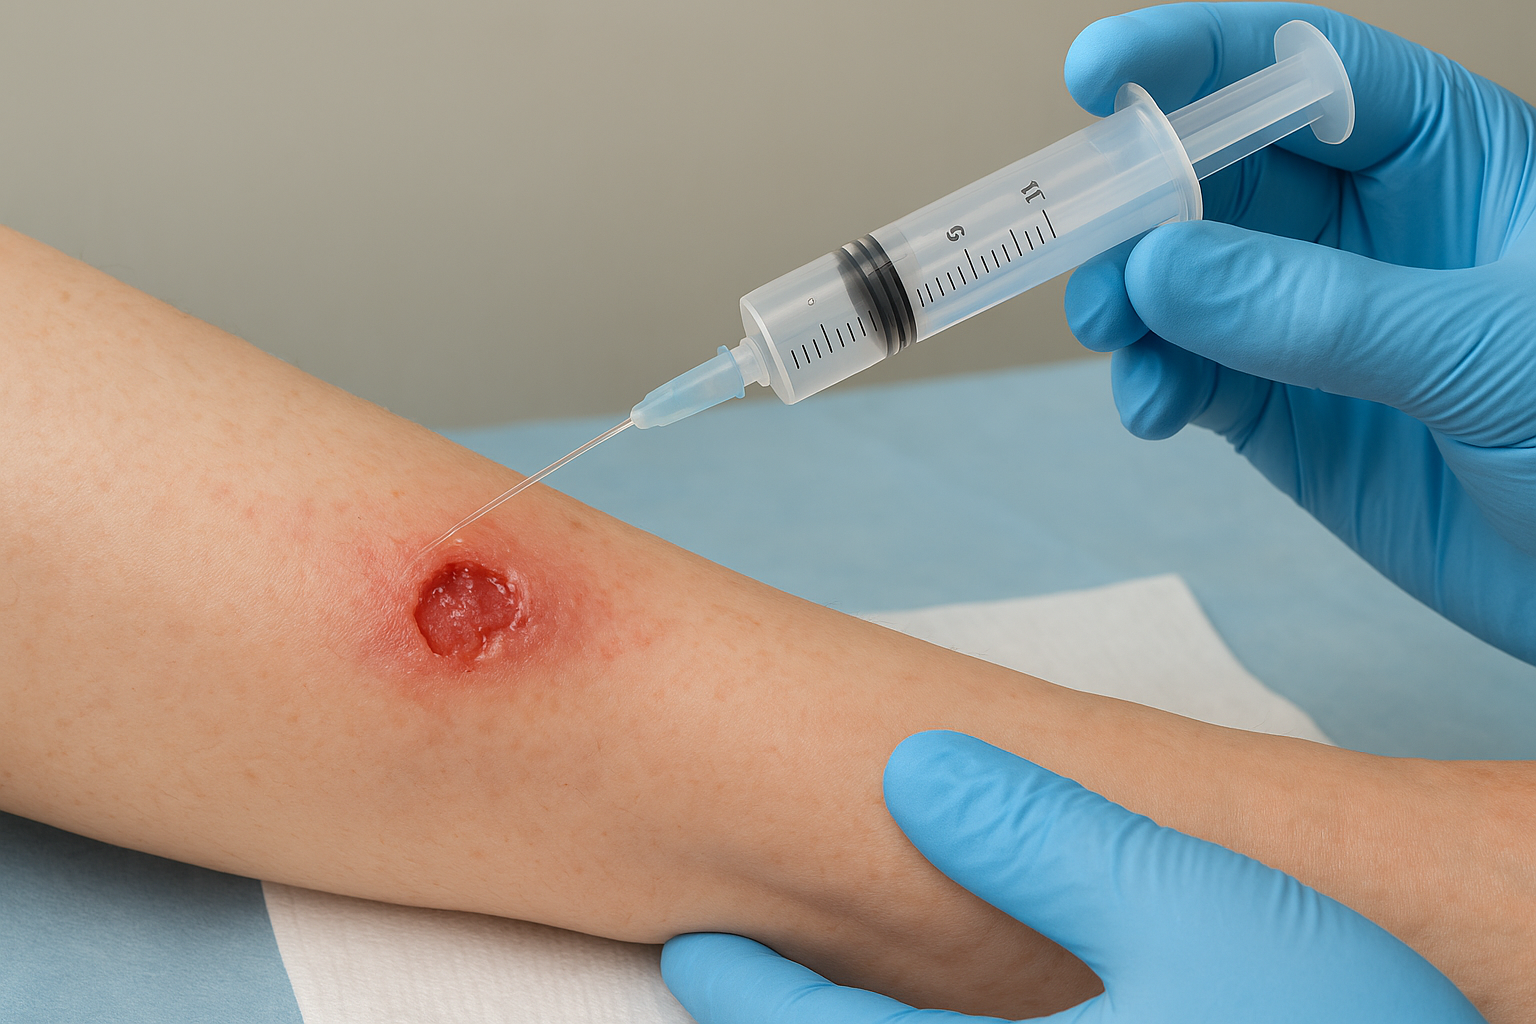
Irrigation pressure below 4 psi is insufficient to disrupt surface biofilm, while pressure above 15 psi risks tissue trauma and bacterial infiltration into deeper layers.
After irrigating the wound bed, clean the periwound skin using a soft gauze or low-lint cloth dampened with your chosen solution. Remove dried exudate, crust, or residue from the surrounding 2 to 3 cm of skin, since biofilm colonization frequently extends beyond the visible wound margin. Pat the periwound dry with clean gauze before moving to debridement, leaving the wound bed moist but the surrounding skin protected from excess moisture that accelerates maceration.
Step 4. Debride safely and choose the right method
Debridement is the most critical disruption step in biofilm based wound care because it physically removes the biofilm structure that cleansing alone cannot reach. Where cleansing strips the loose surface layer, mechanical debridement cuts through the attached biofilm matrix embedded in devitalized tissue. The method you select depends on the wound type, tissue condition, available tools, and your clinical scope of practice. Using the wrong method on the wrong wound causes unnecessary pain, bleeding, or tissue damage that sets healing back rather than forward.
Match your debridement method to the wound
No single debridement method works for every wound, and choosing incorrectly carries real risk. Sharp debridement with a scalpel or curette is the most effective method for removing established biofilm in wounds with visible necrotic tissue or fibrinous slough, but it requires clinical training and a healable wound with adequate perfusion. Mechanical debridement using a monofilament fiber pad is a lower-risk option appropriate for wound beds with softer slough or for patients where sharp instruments aren’t appropriate. Autolytic debridement using moisture-retentive dressings works slowly and is unsuitable as a primary biofilm disruption strategy because it does not mechanically break the matrix.
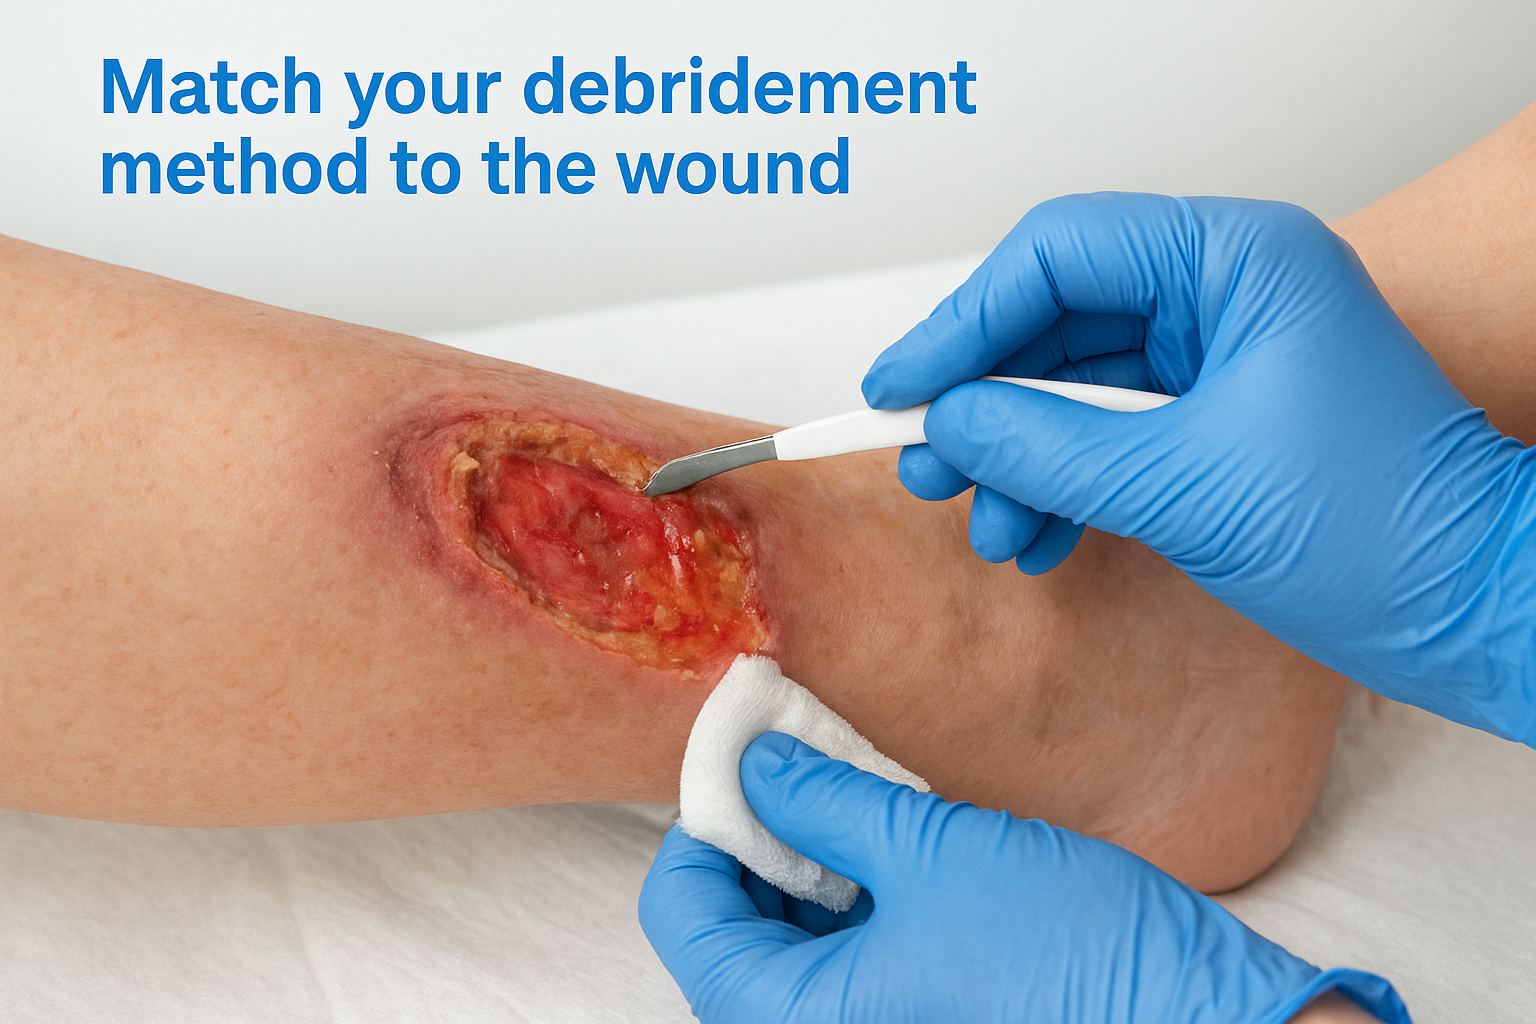
Use this table to select your method based on wound presentation:
| Wound Presentation | Recommended Method | Avoid |
|---|---|---|
| Thick necrotic eschar, adequate perfusion | Sharp debridement (scalpel/curette) | Autolytic alone |
| Soft fibrinous slough, fragile periwound | Monofilament pad + low-pressure irrigation | High-pressure sharp debridement |
| Ischemic or non-healable wound | Conservative moist wound management | Sharp or aggressive mechanical debridement |
| Post-surgical wound, granulating bed | Gentle mechanical (monofilament) | Sharp instruments near new granulation |
Use sharp debridement correctly at the bedside
When sharp debridement is indicated, work systematically from the wound edges toward the center, removing devitalized tissue in thin layers rather than cutting deeply in a single pass. Use a curette for soft slough and fibrinous material and reserve the scalpel for harder necrotic tissue. Stop immediately if you reach viable tissue indicated by pinpoint bleeding, sensory response, or a change in tissue texture.
Removing only devitalized tissue and stopping at the viable wound margin reduces bleeding risk and avoids damaging the granulation base you are trying to expose.
After debridement, assess the full wound bed for depth, undermining, and the presence of any exposed structures before applying your antimicrobial dressing. Document what tissue types were removed, the tool used, and any patient response to pain during the procedure so your records reflect exactly what occurred at each session.
Step 5. Reduce regrowth with topical antimicrobials
Debridement disrupts the biofilm structure, but it does not eliminate regrowth. Within 72 hours of mechanical removal, a new biofilm colony can re-establish on the wound surface. Applying a topical antimicrobial dressing immediately after debridement is the step that extends your disruption window and slows the rate at which bacteria re-colonize the wound bed. This is where biofilm based wound care moves beyond a single-session intervention and becomes a sustained suppression strategy.
Applying your antimicrobial dressing within minutes of completing debridement captures the window when bacteria are most vulnerable, before the protective matrix begins to reform.
Select an antimicrobial that targets biofilm
Not all antimicrobial dressings work the same way against biofilm. Your selection needs to match both the wound’s bacterial burden and the condition of the surrounding tissue. Cadexomer iodine releases iodine slowly into the wound bed and has strong evidence for disrupting biofilm in chronic wounds, particularly venous ulcers and diabetic foot wounds. Polyhexanide (PHMB)-impregnated dressings are a well-tolerated option for wounds with fragile periwound skin or in patients sensitive to iodine. Silver-containing dressings, such as nanocrystalline silver or silver sulfadiazine, remain useful for wounds with high bacterial load, but reserve them for infected or critically colonized wounds rather than routine maintenance because prolonged use can impair fibroblast activity in the wound bed.
Use this table to match your dressing choice to the wound status:
| Wound Status | Recommended Antimicrobial | Duration of Use |
|---|---|---|
| Confirmed or suspected biofilm, healing trajectory | Cadexomer iodine or PHMB dressing | 2 to 4 weeks, then reassess |
| High bacterial load, critically colonized | Nanocrystalline silver dressing | 2 weeks maximum, then switch |
| Fragile periwound or iodine sensitivity | PHMB foam or impregnated gauze | Continue while biofilm risk persists |
| Granulating wound, low bacterial load | Transition to non-antimicrobial moisture dressing | Discontinue antimicrobial once stable |
Apply and maintain contact time correctly
Selecting the right dressing only works if you apply it correctly and change it on schedule. Most antimicrobial dressings require direct contact with the entire wound bed to release their active agent effectively. Pack any dead space loosely with a compatible filler before placing your primary dressing, and ensure the dressing extends at least 1 cm onto the periwound skin to cover the bacterial spread zone beyond the wound margin.
Follow the manufacturer’s recommended change frequency, which is typically every two to three days for silver dressings and every one to three days for cadexomer iodine. Extending dressing wear time beyond the stated interval exhausts the antimicrobial reservoir and leaves the wound unprotected against regrowth during the interval that matters most.
Step 6. Reassess progress and escalate care fast
Reassessment is what converts a single wound care session into a functioning treatment plan. Without structured measurement at each visit, you have no reliable way to determine whether your biofilm based wound care strategy is working or whether the wound needs a different approach. Set a clear reassessment schedule before you leave after every session, and document findings consistently so you can track changes objectively over time rather than relying on memory or general impression.
Measure wound progress at every visit
Use consistent, objective measurements each time you see the wound. Record wound dimensions (length, width, and depth in centimeters), the percentage of wound bed covered by each tissue type (granulation, slough, necrosis), the volume and character of exudate, and the condition of the periwound skin. Taking a photograph at each visit alongside a ruler gives you a visual record that supplements your written documentation and supports communication with the referring physician.
A wound responding to treatment should show measurable improvement within two to four weeks of starting a structured biofilm disruption protocol. Research consistently shows that a wound reducing in surface area by at least 20 to 30% in the first four weeks has a high probability of going on to heal. If you are not seeing that trajectory, the current plan needs to change before the window for recovery narrows further.
Measuring the same wound parameters at every visit using the same tools removes guesswork and gives you objective data to justify clinical decisions to the referring team.
Know when to escalate and what to do
Recognize the specific signs that tell you bedside management is no longer sufficient and the patient needs a higher level of intervention. Do not wait for the wound to deteriorate over multiple visits before acting. Early escalation consistently produces better outcomes than delayed referral.
Escalate care immediately if you observe any of the following:
- No wound size reduction after four weeks of consistent biofilm disruption and antimicrobial therapy
- Increasing depth, tunneling, or undermining that was not present at the prior visit
- Periwound cellulitis expanding beyond 2 cm from the wound edge despite current antimicrobial treatment
- New necrosis appearing in a previously granulating wound bed
- Patient reporting increased pain at rest, which suggests deepening infection or critical ischemia
When these signs appear, contact the referring physician immediately and share your documented measurements and photographs. Request a vascular assessment, wound culture, or imaging if you suspect osteomyelitis or deep tissue infection. Escalating with clear documentation shortens the time to appropriate intervention and reduces the risk of irreversible tissue loss for your patient.
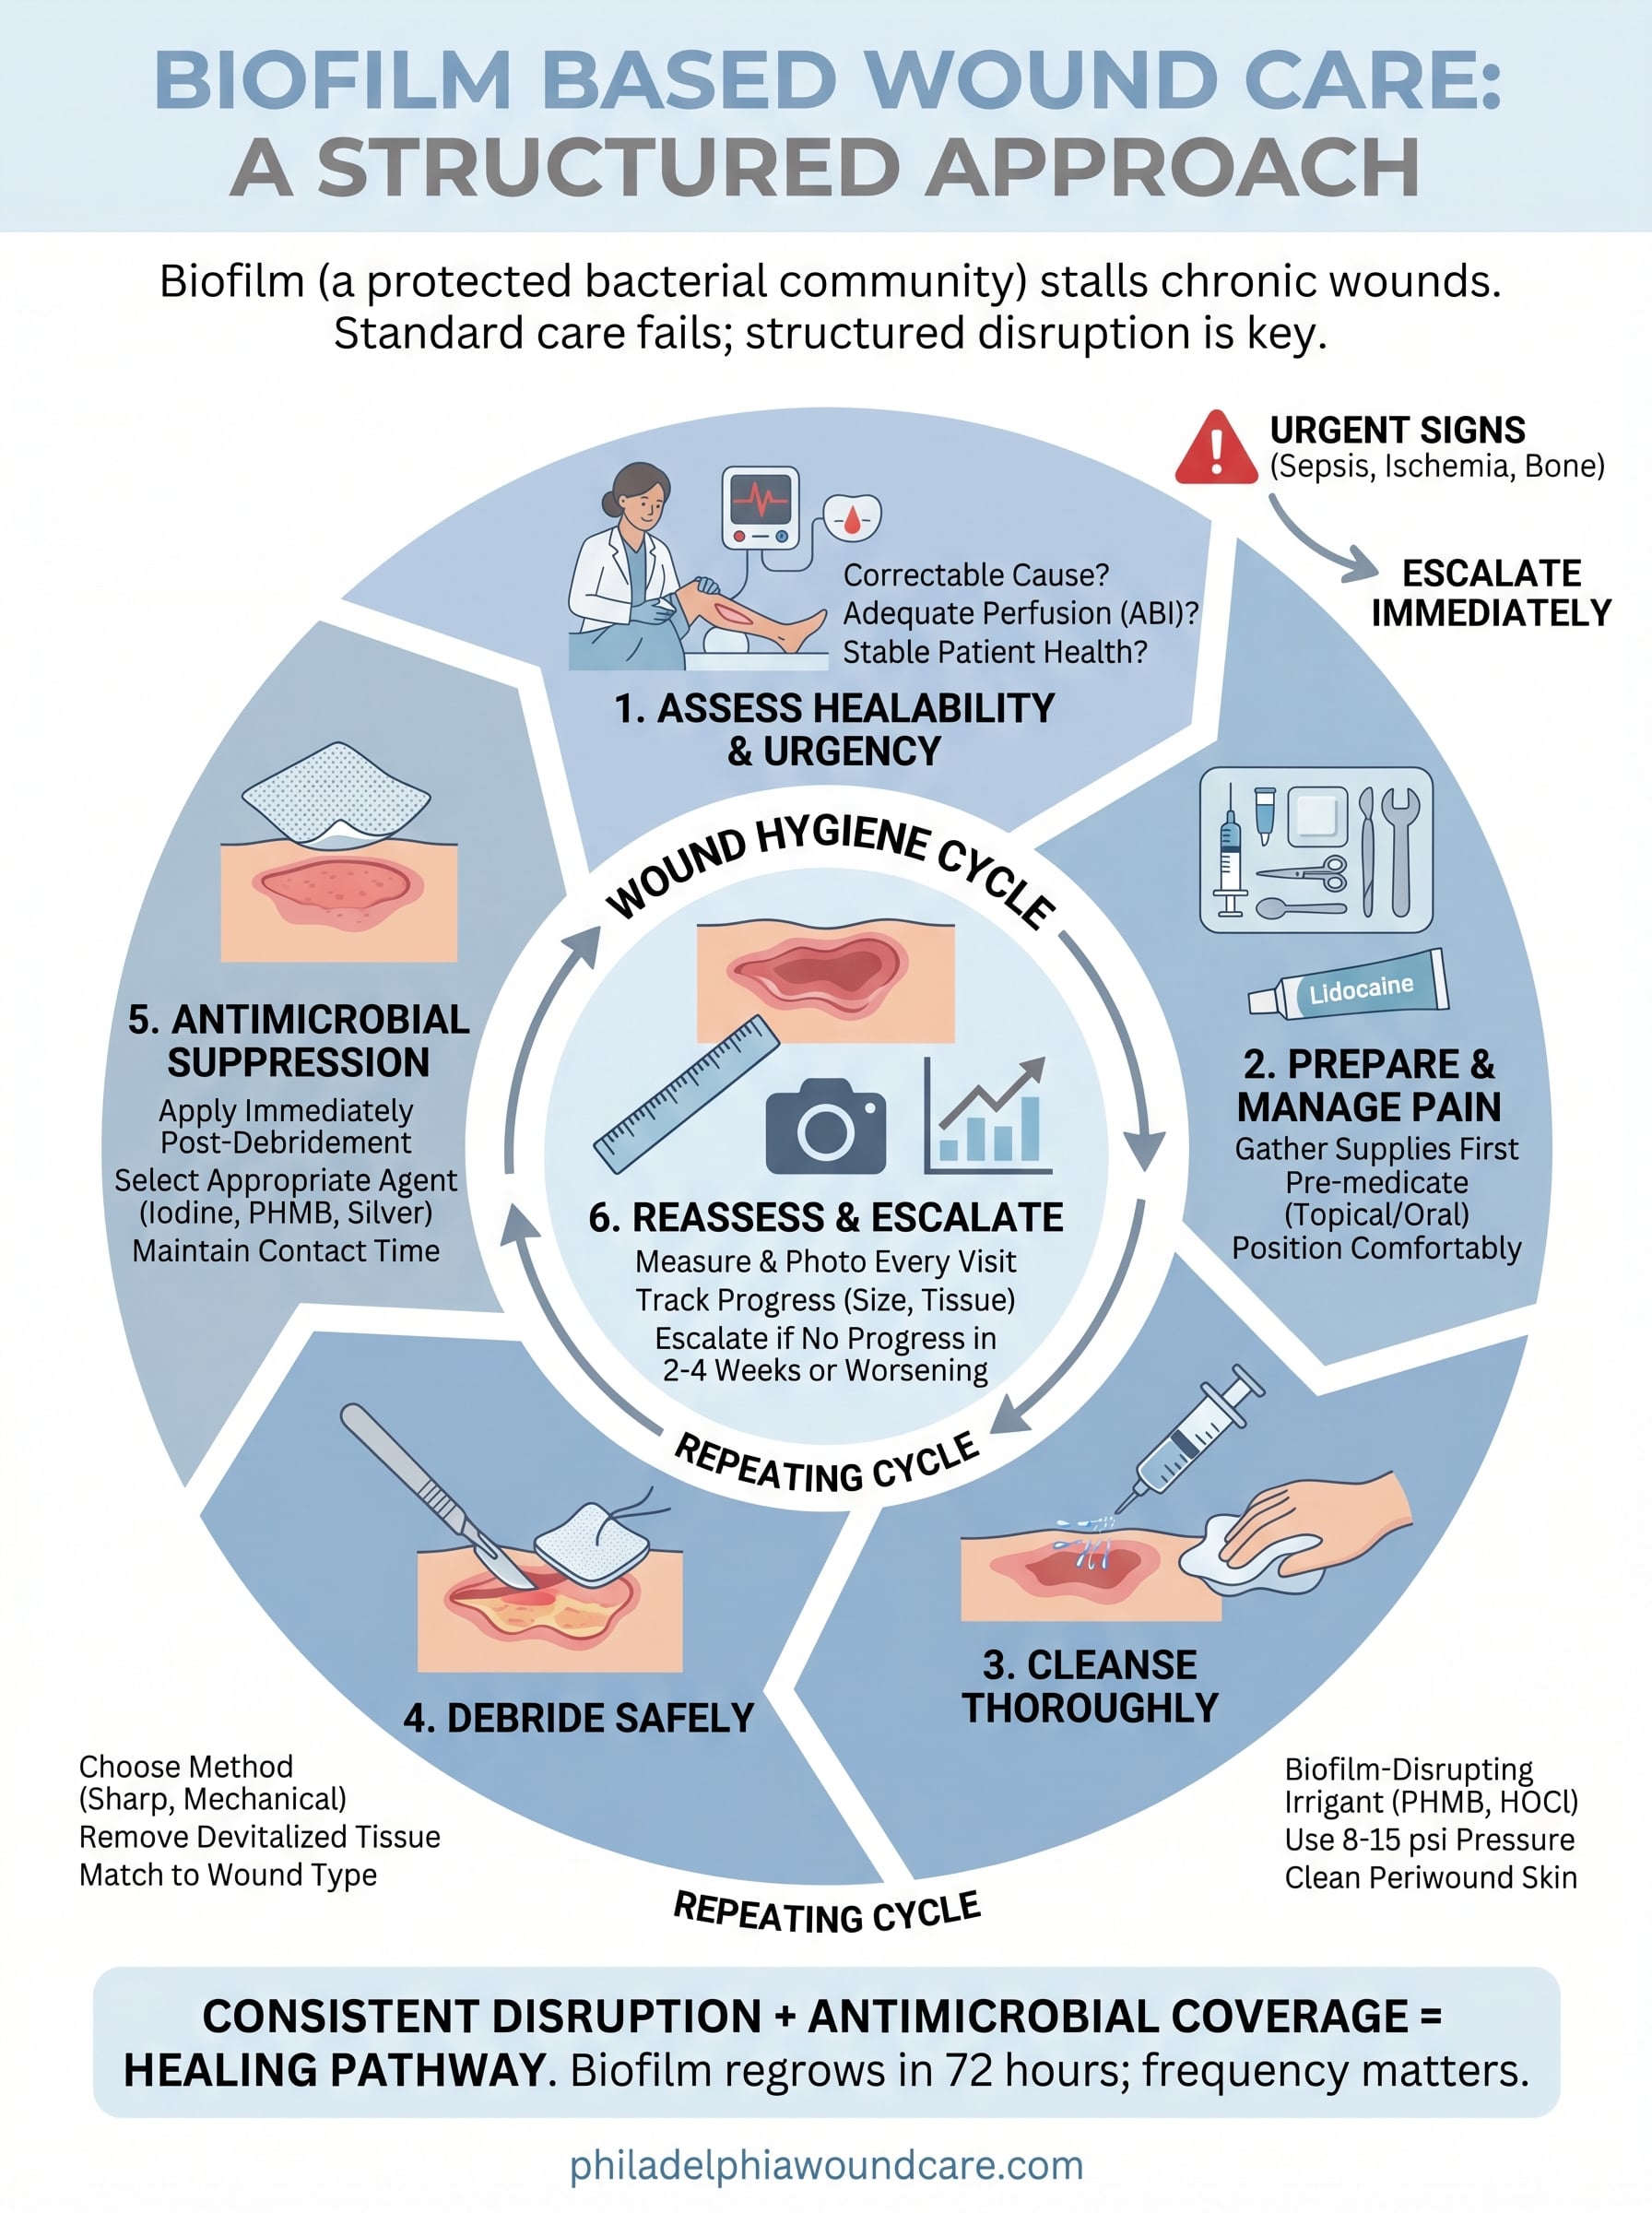
Next steps for safer wound healing
Biofilm doesn’t wait, and neither should your treatment plan. The steps in this guide give you a structured, repeatable framework for breaking the cycle that keeps chronic wounds from closing. Applied consistently, this biofilm based wound care approach gives your patient a real path toward healing rather than a holding pattern of weekly dressing changes that never move the wound forward. If you are managing a wound that has stalled despite best efforts, the answer is rarely doing more of the same; it is applying the right sequence at the right frequency.
Bringing this level of care to patients who cannot travel to a clinic is exactly what our physician-led mobile practice does across the Philadelphia area. Whether you are a family caregiver, a facility case manager, or a referring physician, we are ready to support you. Request mobile wound care services in Philadelphia and get an expert evaluation started within 24 hours.