

Garlic Healing Tonic Soup: How To Make For Cold Relief Today
Nutrition plays a direct role in how the body fights infection, manages inflammation, and repairs tissue, and that matters whether you’re recovering from surgery, managing a chronic wound, or simply trying to shake off a stubborn cold. At Philadelphia Wound Care, we see firsthand how what patients eat affects how they heal. That’s why we talk about food just as seriously as we talk about clinical treatment.
A garlic healing tonic soup is one of the simplest things you can make at home to support your immune system. Garlic contains allicin, a compound studied for its antimicrobial and anti-inflammatory properties, both relevant to anyone dealing with illness or recovery. For our patients and their caregivers, a warming, nutrient-dense soup can be a practical addition to a healing routine, especially during cold and flu season when immune defenses are already stretched thin.
This guide walks you through how to make a proper garlic tonic soup from scratch, including which ingredients boost its healing potential, tips for maximizing garlic’s active compounds, and simple variations to fit different dietary needs. No culinary expertise required, just a pot, a stove, and about 30 minutes.
What garlic healing tonic soup is and when to make it
A garlic healing tonic soup is not just chicken soup with extra garlic thrown in. It’s a purposefully constructed broth built around high concentrations of garlic, aromatics like ginger and onion, and a clean liquid base designed to deliver anti-inflammatory and antimicrobial compounds through a warm, easy-to-digest meal. The goal is to support the immune system when it’s under pressure, reduce nasal congestion, soothe an irritated throat, and keep the body nourished when solid food feels like too much work.
What sets this soup apart from regular broth
The difference comes down to ingredient concentration and preparation method. Standard chicken broth might include garlic as a background flavor, but a tonic soup uses garlic as the primary therapeutic ingredient, often with 10 to 20 cloves per batch. When garlic is crushed or chopped and then given time to rest before cooking, it produces more allicin, the compound linked to its immune-supporting and antimicrobial properties. Combine that with ginger’s gingerols, turmeric’s curcumin, and the hydrating warmth of a good broth, and you have a soup that functions as both food and a support system for your body’s recovery process.
Allicin forms only when garlic is damaged (crushed, chopped, or minced) and then exposed to air for at least 10 minutes before heat is applied, so that prep step matters.
Your base liquid matters just as much as the garlic itself. A bone broth or a quality vegetable stock provides collagen, amino acids, and minerals that a plain water-based soup cannot. These nutrients support tissue repair, which is particularly relevant for anyone recovering from illness, post-surgical healing, or managing a wound that needs nutritional backing.
The right moments to make a batch
You don’t need to wait until you’re fully sick to benefit from this soup. Early-stage cold symptoms like a scratchy throat, fatigue, or sinus pressure are the ideal trigger for starting a pot. The sooner you introduce anti-inflammatory compounds into your system, the more support your immune response gets during the window when it’s actively fighting off infection.
That said, a garlic healing tonic soup is worth making as a regular winter staple, not just a reactive remedy. If you’re a caregiver for someone with a compromised immune system, a chronic wound, or limited mobility, keeping a batch in the refrigerator gives you a fast and nutritious option on difficult days. It stores well for up to five days and reheats in minutes, which makes it practical even when energy is low.
Step 1. Gather ingredients and pick smart swaps
Before you touch a knife, pull everything together and set it on your counter. Having your ingredients ready before you start means you won’t accidentally skip the 10-minute garlic resting step that activates allicin, which is the most important part of making this soup therapeutic rather than just flavorful.
The core ingredient list
This garlic healing tonic soup uses simple, accessible ingredients that most grocery stores carry year-round. The quantities below make approximately 4 servings.
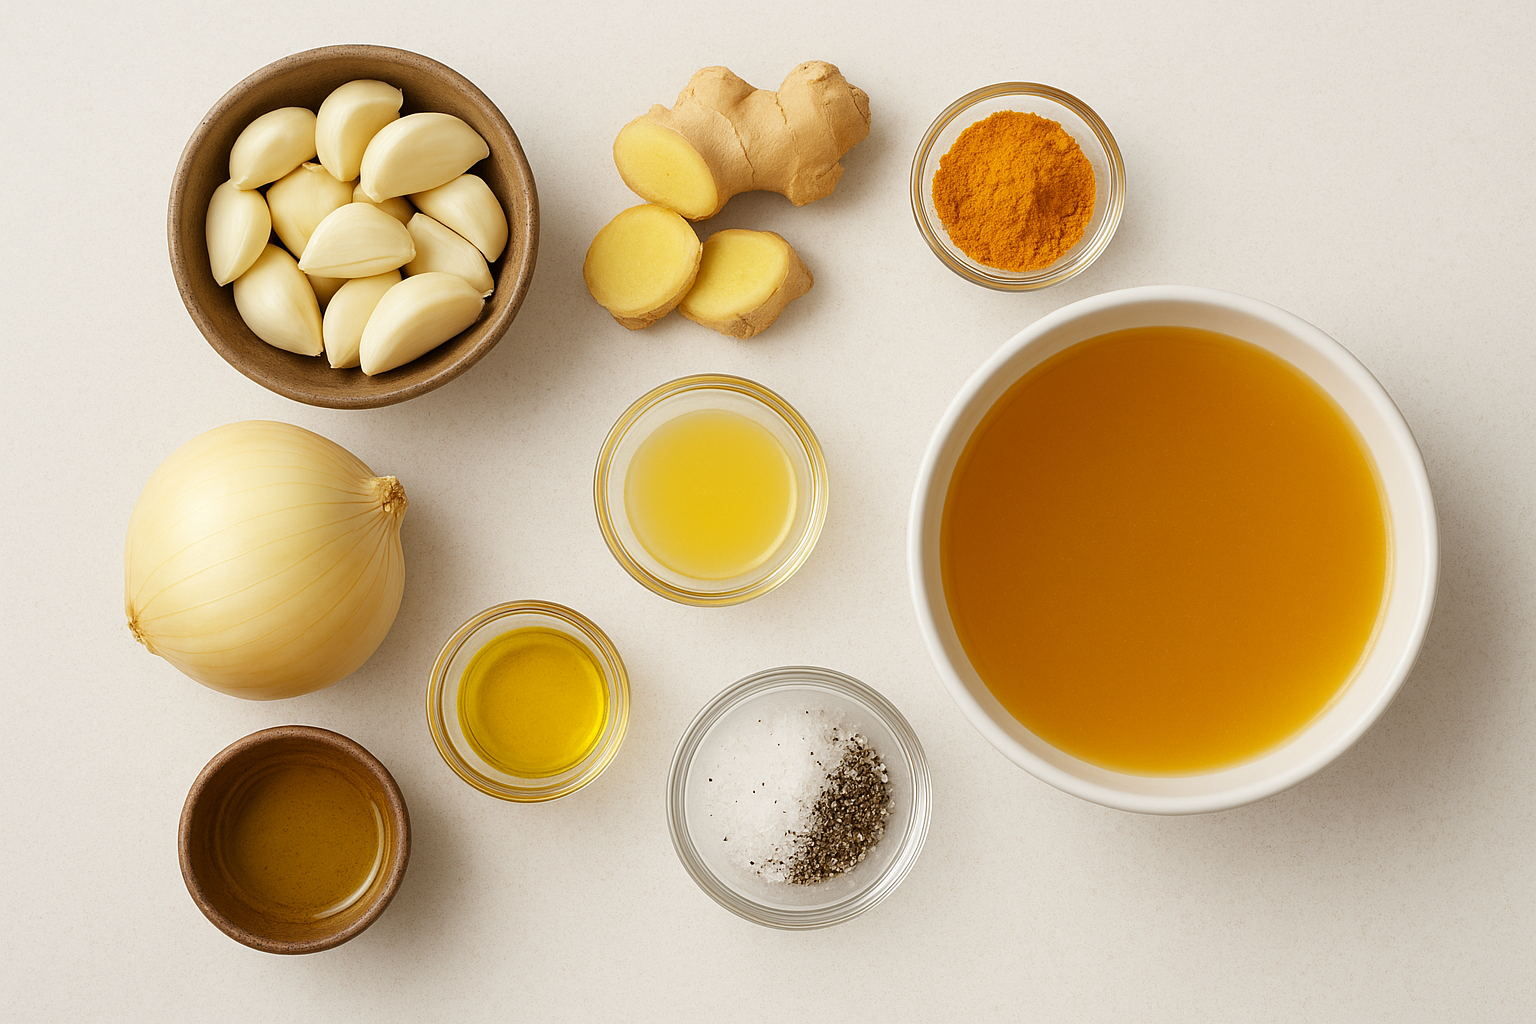
| Ingredient | Amount | Purpose |
|---|---|---|
| Garlic cloves, peeled | 15 to 20 | Primary therapeutic ingredient |
| Yellow onion, roughly chopped | 1 large | Flavor base and quercetin source |
| Fresh ginger, peeled and sliced | 2-inch piece | Anti-inflammatory support |
| Turmeric powder or fresh root | 1 tsp powder or 1-inch piece | Curcumin and color |
| Bone broth or quality vegetable stock | 6 cups | Protein, minerals, and depth |
| Olive oil | 2 tbsp | Fat for nutrient absorption |
| Fresh lemon juice | 2 tbsp | Brightness and vitamin C |
| Salt and black pepper | To taste | Seasoning and absorption aid |
Black pepper contains piperine, which research shows can increase curcumin absorption from turmeric by up to 2,000 percent, so always add both together.
Smart swaps for dietary needs or availability
If fresh ginger isn’t available, substitute 1 teaspoon of ground ginger instead, though fresh delivers a noticeably stronger flavor and more active compounds. Vegetable stock works in place of bone broth if you follow a plant-based diet, just choose a low-sodium version so you can control the salt level yourself.
For extra protein and thickness, stir in one can of drained white beans or add two to three cups of shredded cooked chicken to the finished soup. Both options increase the soup’s caloric and nutritional value without changing its core healing profile, which matters when you’re eating light during recovery.
Step 2. Prep the garlic for a mellow, sweet flavor
How you handle the garlic before it hits the pot determines both its flavor profile and its therapeutic value. Raw garlic straight from the bulb is sharp and pungent. Proper preparation transforms it into something rich, rounded, and deeply savory while preserving the compounds that make this soup worth making in the first place.
Crush, chop, and rest before applying heat
Peel all 15 to 20 cloves and lay them flat on your cutting board. Use the flat side of your knife to crush each clove firmly, then give them a rough chop. Once chopped, spread the garlic out and leave it untouched for at least 10 minutes before it touches oil or broth. This resting period triggers the enzymatic reaction that produces allicin, the active compound responsible for garlic’s antimicrobial properties. Skipping this step and cooking garlic immediately after cutting significantly reduces its potency.
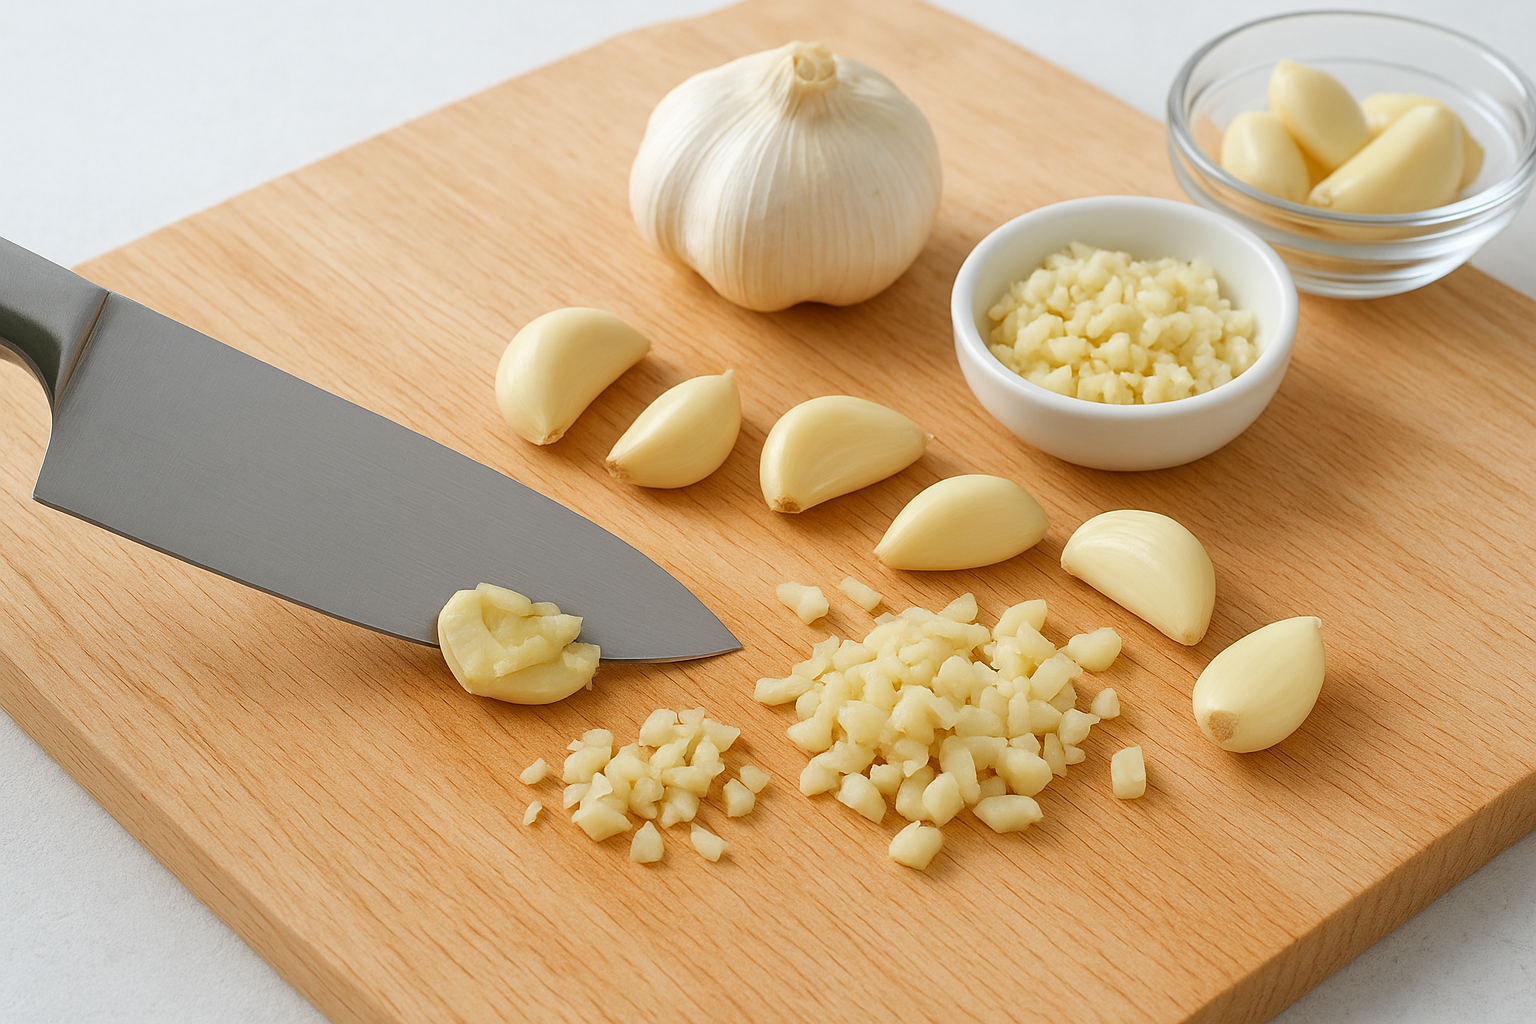
The 10-minute rest is the single most important technique in this entire garlic healing tonic soup recipe, do not rush past it.
Gently sauté to build a sweeter, mellow base
After the garlic has rested, warm your olive oil over medium-low heat in a heavy-bottomed pot. Add the garlic and let it cook slowly for 5 to 7 minutes, stirring occasionally. You want the cloves to turn pale golden and soft, not brown or crispy. Browning garlic too quickly introduces bitterness that will carry through the entire soup.
Add your chopped onion to the pot alongside the garlic during the last 3 minutes of this step. The onion softens and releases its natural sugars, which balance garlic’s intensity and build a savory foundation for the broth. Both ingredients should smell fragrant and look translucent before you move on to the next step.
Step 3. Simmer the broth base until everything turns tender
Once your garlic and onion are soft and fragrant, you’re ready to build the actual broth. This is where your garlic healing tonic soup comes together as a complete dish, and the simmering time does most of the work for you. Low, steady heat extracts flavor and nutrients from every ingredient in the pot without overcooking anything or burning the bottom.
Add the liquid and aromatics in the right order
Pour all 6 cups of broth directly into the pot over your softened garlic and onion. Add the sliced ginger and turmeric at this same stage, since both need time in the liquid to release their active compounds properly. Stir everything together, raise the heat to medium-high until the broth reaches a gentle boil, then immediately reduce it to a low simmer.
Do not let the soup boil aggressively for an extended period, as sustained high heat degrades some of the volatile compounds in ginger and turmeric that contribute to the soup’s anti-inflammatory value.
Maintain a steady, gentle simmer with the lid slightly ajar for 20 to 25 minutes. The garlic cloves should become completely soft and easy to pierce with a fork, and the ginger slices will look pale and slightly translucent. Both signs confirm the broth has fully absorbed the flavor and beneficial compounds from your aromatics.
Know when your soup is ready to blend
Your soup is ready to move forward when the garlic crushes without resistance if you press a clove against the side of the pot with a spoon. The broth will have deepened in color from the turmeric and will smell warm and slightly spiced. Before blending, remove the ginger slices if you used fresh root, since they become fibrous and blend unevenly. Leave everything else in the pot exactly as it is.
Step 4. Blend safely and dial in the seasoning
Blending hot soup is where most kitchen accidents happen, so slow down before you grab the blender. Your garlic healing tonic soup is full of heat and steam at this stage, and both can cause burns or force a lid off an immersion blender container if you move too quickly. Take an extra two minutes here to do this step correctly.
Blend in batches to avoid steam burns
If you use a countertop blender, let the soup cool for 5 minutes off the heat first. Fill the blender no more than halfway per batch, hold a folded kitchen towel firmly over the lid with your hand, and start on the lowest speed setting before increasing. The towel catches any pressure that builds under the lid from steam. Never fill a hot blender to capacity, since the liquid expands as it moves and pressure can force the lid off mid-blend.
An immersion blender is the safest option for this soup because it lets you blend directly in the pot without transferring hot liquid.
If you use an immersion blender, keep the head fully submerged while it runs to prevent splashing. Blend in slow, circular motions until the soup reaches a smooth, creamy consistency. A few passes around the pot usually take about 60 to 90 seconds.
Finish with lemon juice and taste for balance
Once blended, return the pot to low heat and stir in your two tablespoons of fresh lemon juice. The acid brightens the entire broth and softens any remaining bitterness from the turmeric. Taste the soup at this point and adjust the salt gradually, adding a pinch at a time rather than pouring freely. Black pepper goes in last, both for flavor and to activate the turmeric’s curcumin. Your final soup should taste warm, savory, and slightly tangy with no single flavor overpowering the others.
Keep it simple as you recover
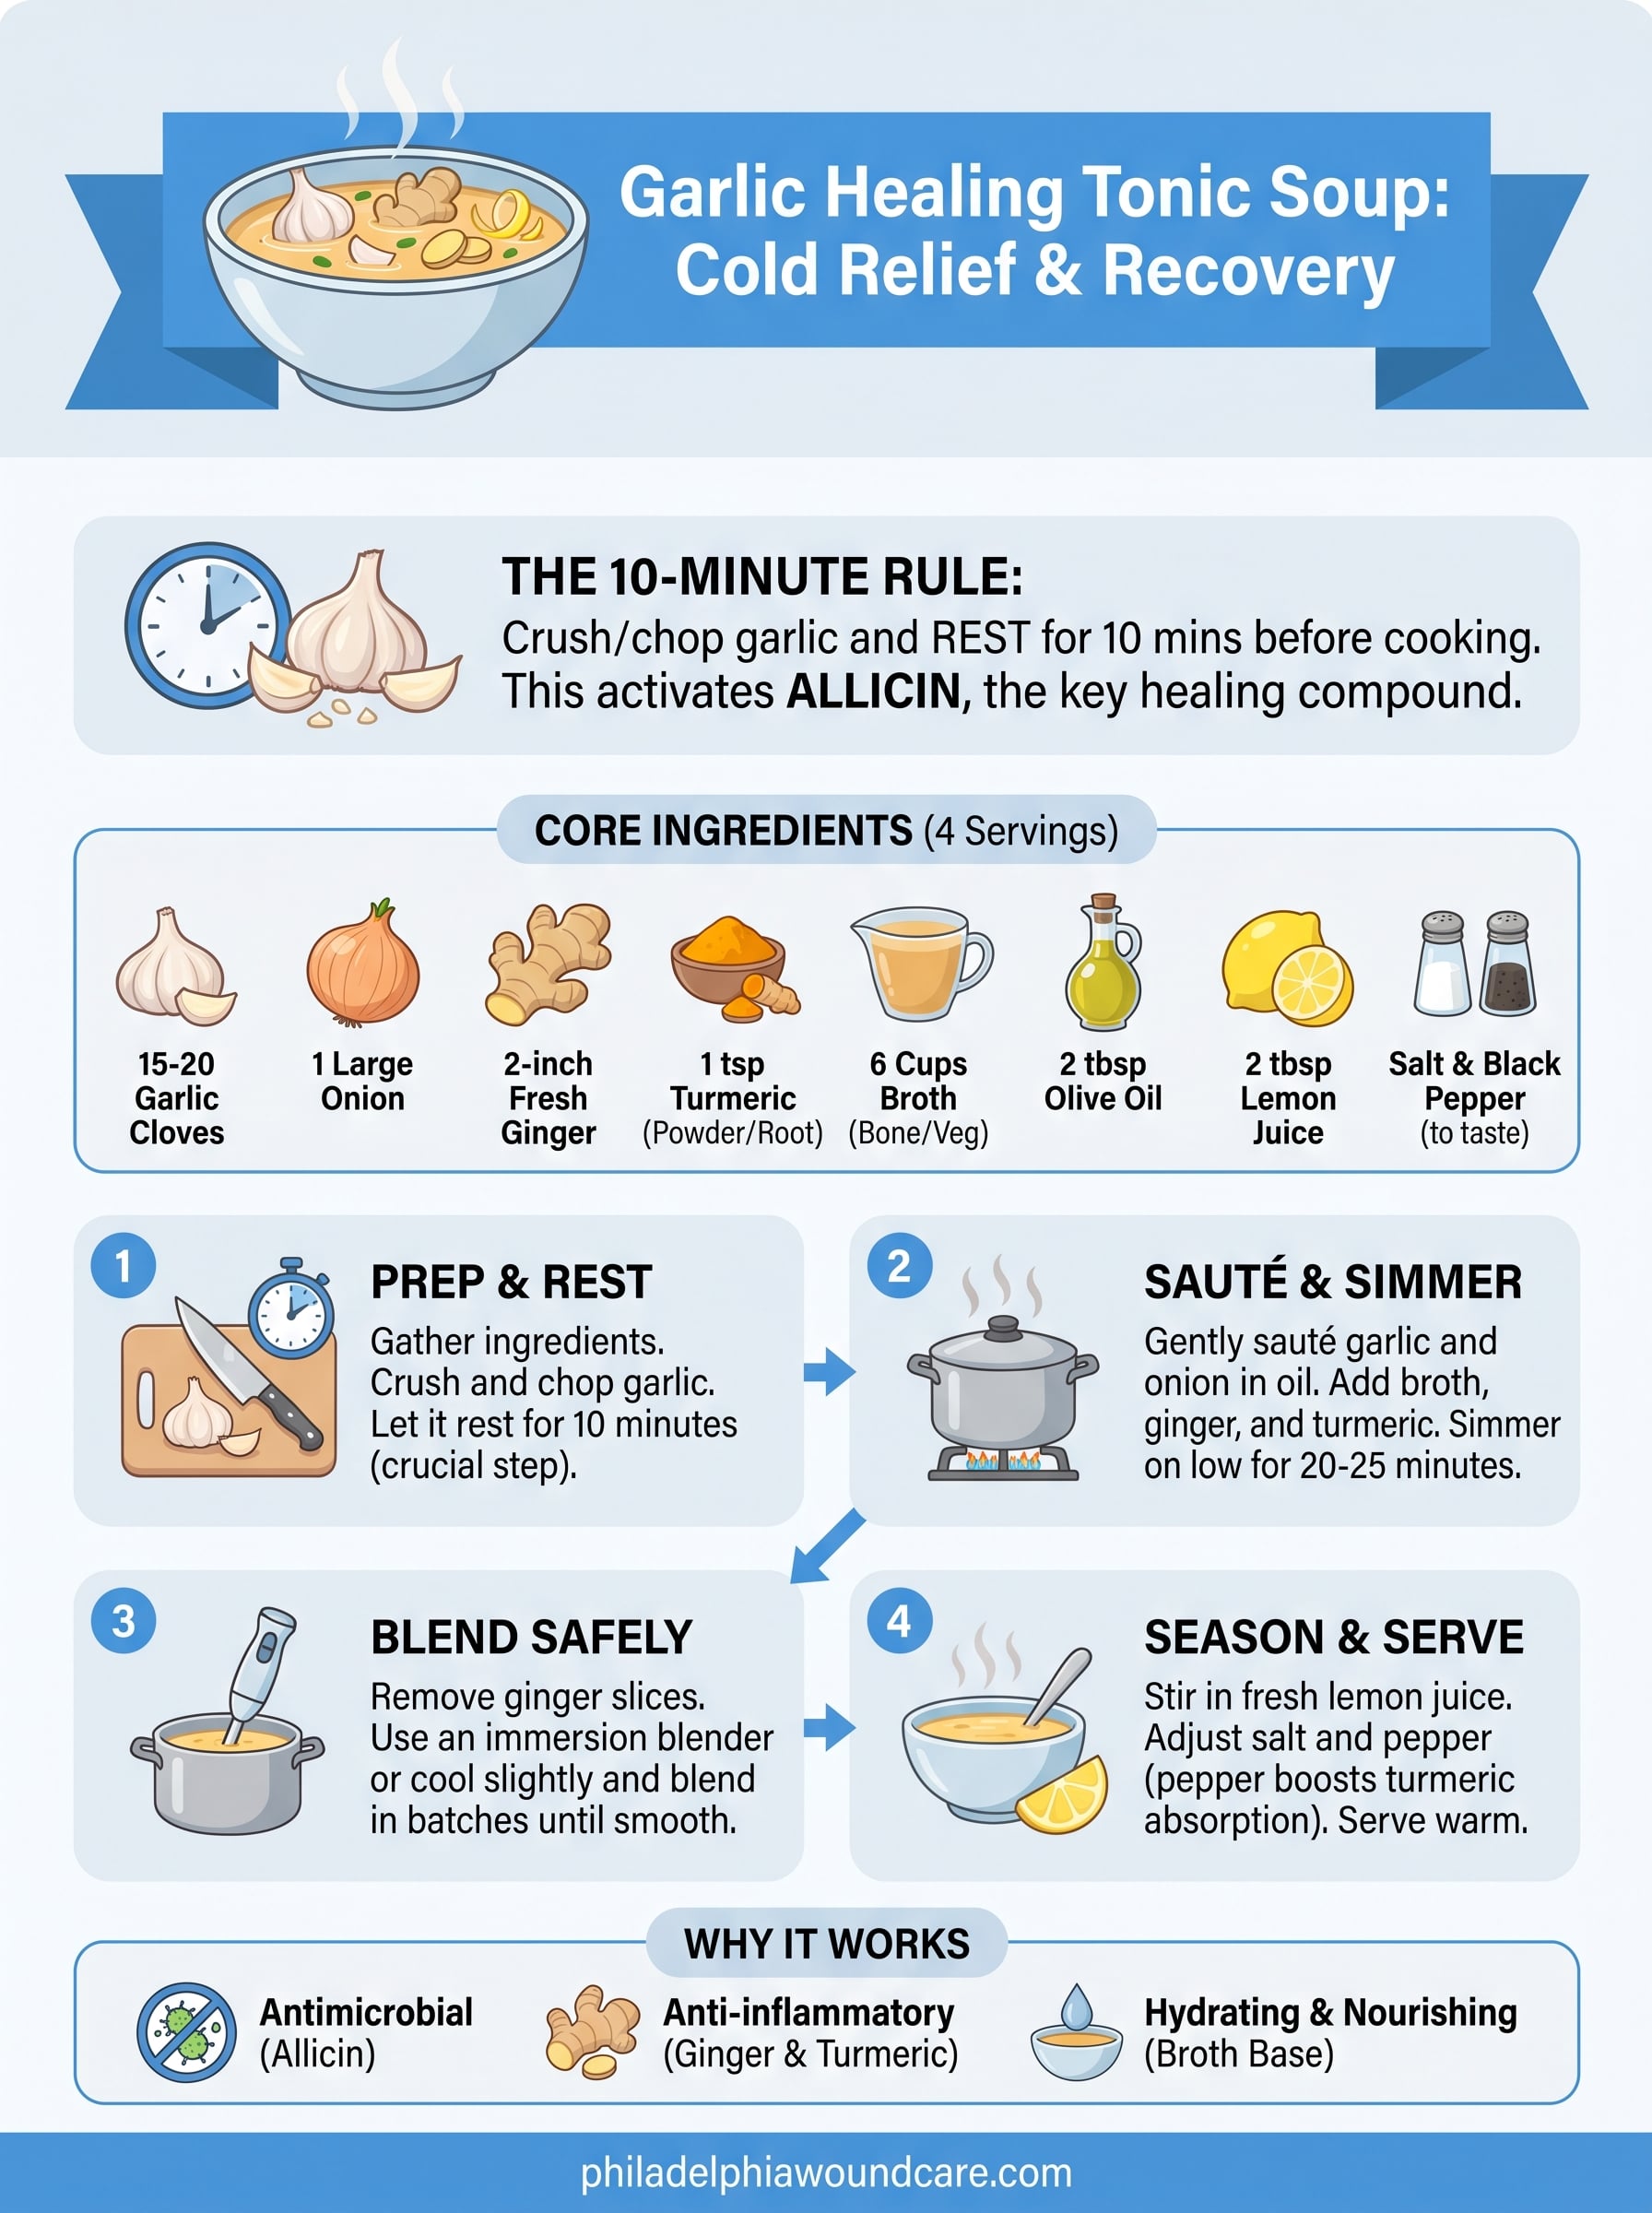
You now have everything you need to make a garlic healing tonic soup that actually works. The steps are straightforward: crush and rest your garlic, sauté slowly, simmer with ginger and turmeric, blend carefully, and finish with lemon juice. Each step serves a specific purpose, and skipping any one of them reduces the therapeutic value of the final result.
Recovery, whether from a cold, a surgery, or a chronic condition, takes more out of you than most people expect. Your body needs consistent nutritional support alongside any medical treatment you’re receiving. This soup is one practical, low-effort way to provide that support on days when cooking feels difficult.
If you or someone in your care is managing a non-healing wound or a complex post-surgical recovery, professional medical support matters just as much as good nutrition. Learn more about mobile wound care services in Philadelphia and how expert care can come directly to you.